


Hello to all ServiceNow enthusiasts! Welcome back to the fourth and final part of the Understanding ServiceNow blog series. It’s the end of the year, and Christmas is right around the corner. In this holiday spirit, let’s rejoice with some ornamental lights, a dark green tree, some red home decor and a little ServiceNow learnings by the side 😊
If you haven’t read the previous parts of this blog series, find them here:
- Understanding ServiceNow Part 1 : SNow-Fall : https://integrtr.com/understanding-servicenow-part-1/
- Understanding ServiceNow Part 2 : The SNow-man’s Pumpkin : https://integrtr.com/understanding-servicenow-part-2/
- Understanding ServiceNow Part 3 : Let it SNow : https://integrtr.com/understanding-servicenow-part-3/
In this blog, we will be discussing ServiceNow’s position in the marketplace and how it connects with other third-party solutions. More precisely, we will be looking at how ServiceNow and SAP SuccessFactors could work together. By the end of this blog you will be able to:
- Generate an X.509 Certificate on SuccessFactors
- Design and use the Action Designer on ServiceNow
- Establish OAuth 2.0 authentication on ServiceNow
- Load records into an Import Set with the help of a Data Source
Without further ado, let’s get started!
Third-party Options
There are different ways of connecting any third-party software to ServiceNow. As discussed in the previous parts of this blog series, you can do so with the help of REST messages, installed spokes, and actions offered by Flow Designer. Additionally, you can also build your own custom REST request to make any outbound HTTP calls.
SuccessFactors Spoke
With the help of the SuccessFactors Spoke, you can manage some of your entities and data present in your SuccessFactors system. Some of the actions available under this spoke include retrieving worker profiles, todos, locations.
As of the December 2022 release, you can fetch up to 500 records in full load using this Spoke.
The Spoke connects to your SuccessFactors system using Credentials and Connections which should have the SuccessFactors user details in storage.
Action Designer
With the help of the Action Designer, you can automate a set of custom tasks. The action designer reduces the complexity of a flow designer by adding in some amount of modularity. These actions are reusable across multiple flows.
Action executions
The action execution details give you a detailed log of the data that the action was able to fetch.
If your output is saved as an attachment, it would be available in the Context Record as an attachment.
If the error value is zero, and we are able to achieve a payload then our REST request has been a success.

SuccessFactors to ServiceNow Scenario | Hands-on
For this scenario, we will be querying the personal information details of a few employees from SuccessFactors using the PerPerson entity.
Step 1: OAuth 2.0 SAML Bearer Certificate on SuccessFactors
Before we get started with configuring our ServiceNow configuration, we must generate our X.509 Certificate from SuccessFactors. For this, navigate to the transaction Manage OAuth2 Client Applications and click on Register a new client application. You should get the following screen:
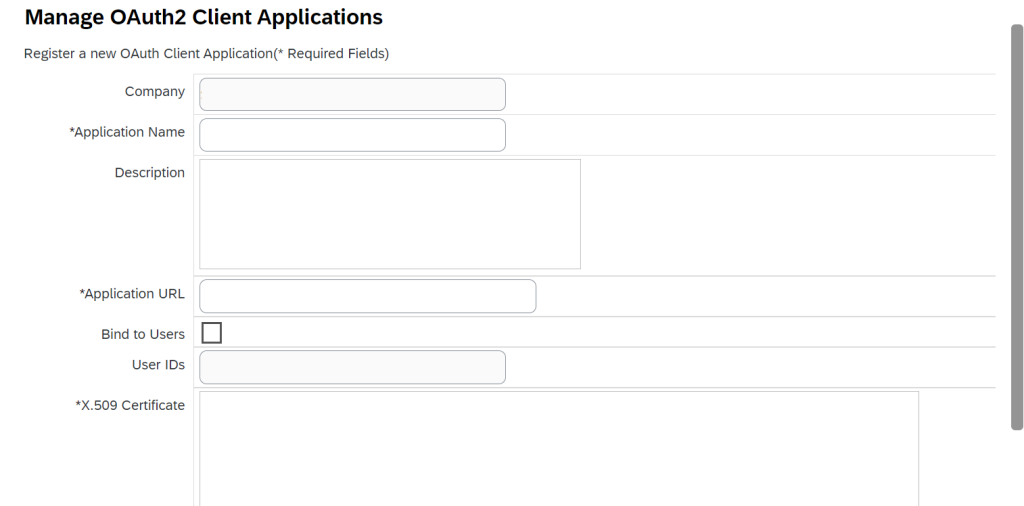
Here, configure the OAuth Client Application as follows:
Company : Your SuccessFactors company id
Application name : Enter your application name
Description : Add a short description in this section
Application URL : Add your ServiceNow instance URL
💡 Note : If you would want only certain users to make use of this certificate you can add the User IDs and bind it to only those users.
Click on Generate X.509 Certificate. Once the certificate is generated, make sure you download it.
In the certificate, we will be making use of the private key which is within the tags of BEGIN ENCRYPTED PRIVATE KEY and END ENCRYPTED PRIVATE KEY.

This would come in use in the upcoming steps.
Next, click on the Register button.
Now, you would see a new field called as the API Key would be available right above the Application URL. Make a note of this key as it will be used in the upcoming steps.
Step 2: REST Action Steps
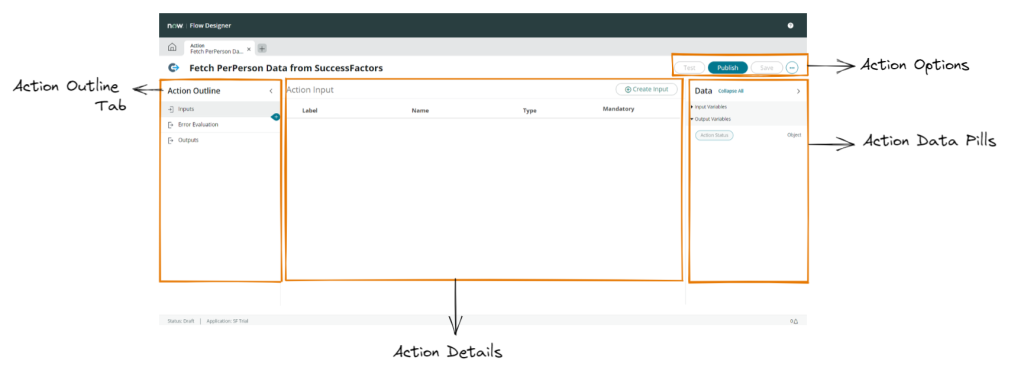
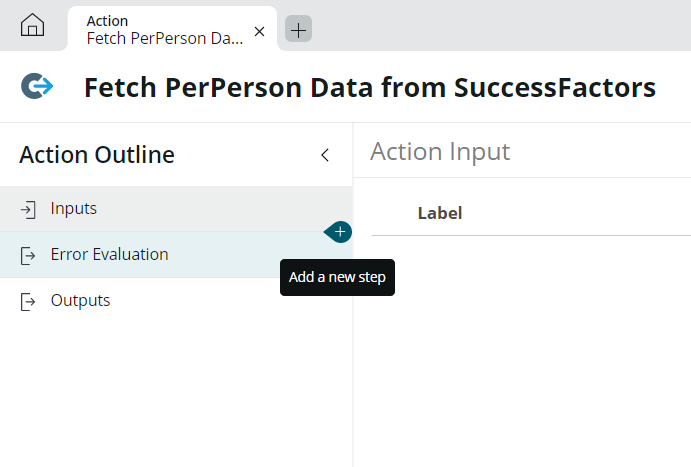
Go to Flow Designer. In the Actions tab, click on the New button to create a new action.

Add the action name as “Fetch PerPerson Data from SuccessFactors” and add in a short description and click Submit.
After creating a new action, we want to create a REST step.
Under the Action Outline panel, click on the ‘+’ button and select the REST option.
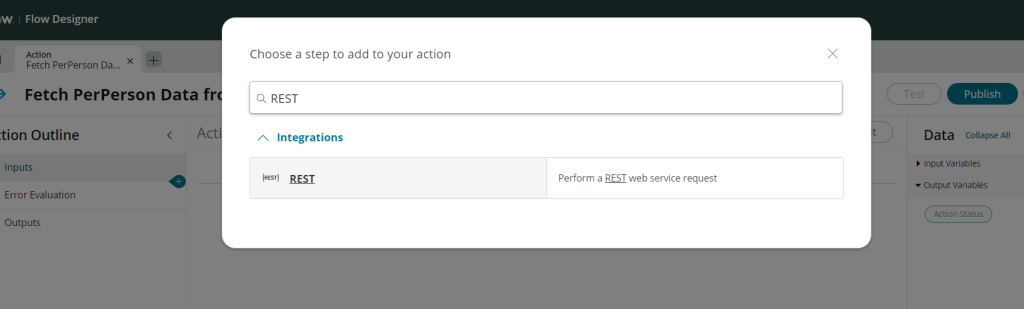
You should get a REST Step that should look something like this.

We want to establish OAuth 2.0 connection with SuccessFactors. For that purpose, we will have to perform 3 REST Steps:
- Get SAML Assertion
- Generate User Token
- Validate Bearer Token
Let’s create and configure each of them now.
1. Get SAML Assertion
The first step to establishing OAuth 2.0 with SuccessFactors is getting the SAML Assertion from SuccessFactors. In this step, make sure that you have the user id which was bounded to the X.509 Certificate in your SuccessFactors system.
In the Connection details of this REST step, add in the following values:
Connection : Define Connection Inline
Base URL : https://{server}.{sf}.eu/oauth/idp
Under Request details, add in the following fields:
Build request : Manually
HTTP Method : POST
Under Request Content, add in the following fields:
Request Type: Form URL-Encoded
| Name | Value |
|---|---|
| client_id | Add the API Key (as noted in step 1) |
| user_id | user id (as bound in step 1) |
| token_url | https://{server}.{sf}.eu/oauth/token |
| private_key | X.509 Certificate private key (as obtained in step 1) |
2. Generate User Token
Next, we will add another REST Step, consecutively after our Get SAML Assertion step using the same “+” button and REST step option. In this REST step, we will be making use of the assertion obtained from the previous step in order to get our access token. To do this, we will have to drag and drop the Response Body data pill of our previous step.
In the Connection details of this REST step, add in the following values:
Connection : Define Connection Inline
Base URL : https://{server}.{sf}.eu/oauth/token
Under Request details, add in the following fields:
Build request : Manually
HTTP Method : POST
Under Request Content, add in the following fields:
Request Type: Form URL-Encoded
| Name | Value |
|---|---|
| company_id | Add the Company ID of your SuccessFactors system |
| client_id | Add the API Key (as noted in step 1) |
| grant_type | urn:ietf:params:oauth:grant-type:saml2-bearer |
| assertion | Response body data pill of “Get SAML Assertion” REST Step from Data panel |
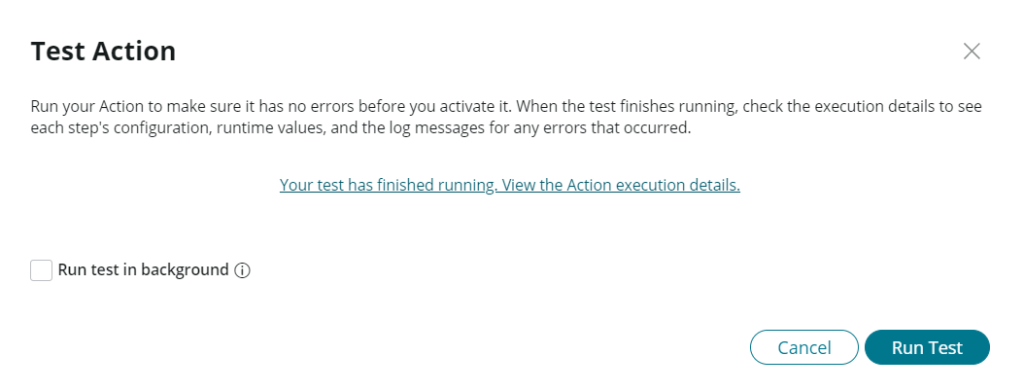
Before we test our query in the next step. Let’s test out the above 2 steps. Click on Save and Test on the upper right side of the screen.
After the test has finished running, View the Action details.
A new window showing the Execution details should open up. Here we need to check the two REST steps that have been configured thus far.
Scroll down to the Steps toggle button and view the Step 1 – Get SAML Assertion [REST] Output Data. It should be as follows:
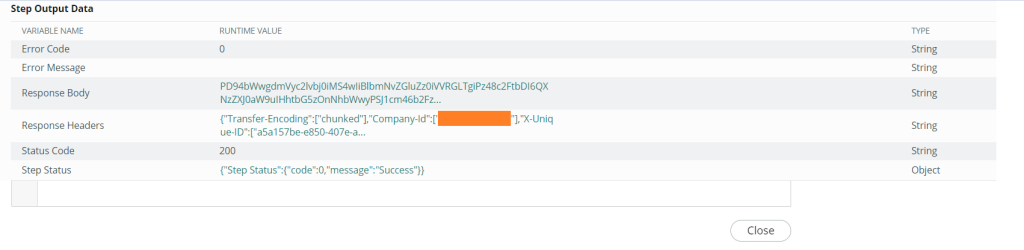
Scroll further down, and view the Step 2 – Get User Token [REST] Output Data. The response should contain the following details.
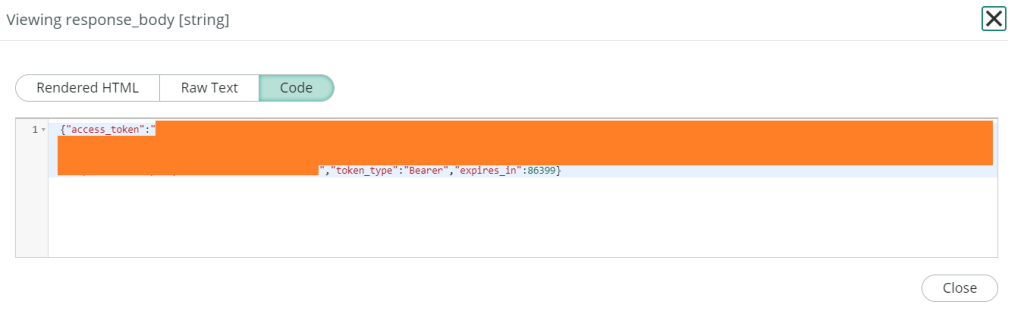
Here, note the value of the access_token which will be used in our next REST Step.
3. Validate Bearer Token
After confirming that the previous two REST steps are successfully executed, we will be adding another REST step which is essentially our SuccessFactors query required to be performed in order to get the PerPerson details of a few employees from our SuccessFactors system. This query would finally validate our bearer token. Your action outline must look like this:

We want to get our response in a JSON format, so we make use of the Accept query parameter accordingly.
In the Connection details of this REST step, add in the following values:
Connection : Define Connection Inline
Base URL : https://{server}.{sf}.eu
Under Request details, add in the following fields:
Build request : Manually
HTTP Method : GET
Resource Path : /odata/v2/PerPerson?$top=10
Headers:
| Name | Value |
|---|---|
| Content-type | application/xml-dtd |
| Accept | application/json |
| Authorization | Bearer <access_token> (from response body of “Get User Token” REST step) |
Save, and run a Test.
You should be able to view your SuccessFactors payload in the Output Data of our third REST Step.
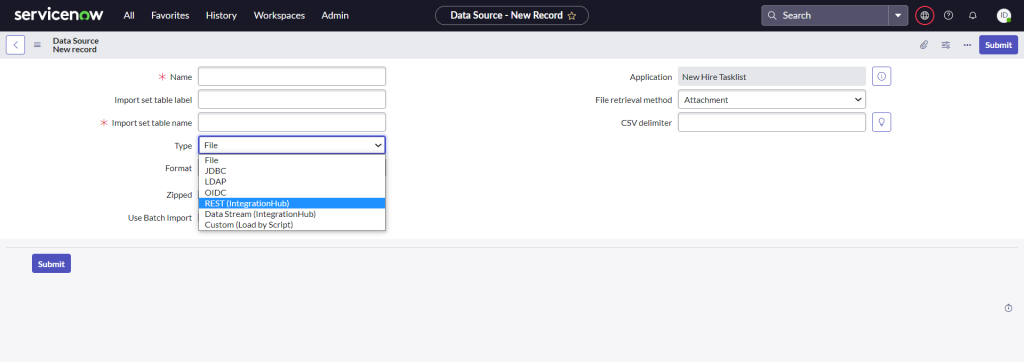
Data Source
Now, we have our hook into SuccessFactors directly from ServiceNow. We can reuse this Action in multiple ways. Once you get your data into ServiceNow, you can build your own ServiceNow Database Architecture. One way of going about this is with the help of Data sources. When creating a new Data source in ServiceNow, you can directly run it with a REST action step.
As our payload is in JSON format, we can also parse our data accordingly here.
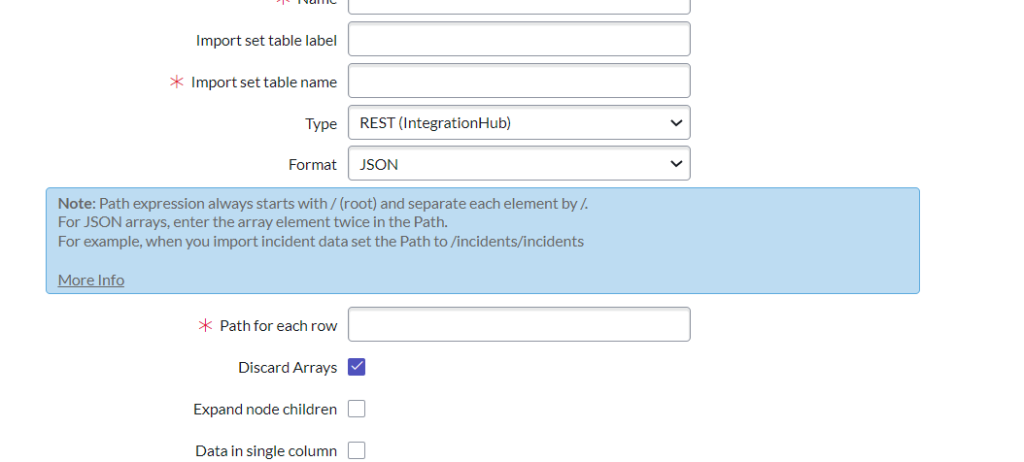
In case, the incoming data is in neither XML nor JSON format, you can also make use of the Custom script parser.
On loading data with the help of data sources, the data gets stored as an Import set.
Conclusion 🎄
The opportunities are endless once you can connect two of the biggest players in the software world. SAP SuccessFactors has a huge market in the HR space with a number of companies storing their HR data there. ServiceNow is also being vastly used for ticketing, asset tracking, approval management, and much more. Considering the scenario that we established in this blog, going further, we can make use of transform maps on our import set to get our data in a ServiceNow table. This ServiceNow table could be made use of in any application that may be built with say, the UI builder. Alternatively, we can perform further customization on our table using the flow designer.
There are numerous ServiceNow features that you can explore and build with. This festive season, test out some actions and flows as you write your letters to Santa! 🎅🏼
Till then, we wish you a Merry Christmas and a Happy New Year 2023!