


Let’s be honest—whether you love them or find their code a mystery, ABAP developers are the backbone of the SAP world. You might automate processes, integrate AI, and optimize workflows, but when a business user needs a custom enhancement, who do they call? ABAPers.
Imagine this: A functional consultant needs to tweak a custom approval workflow setting in SAP. They open SPRO, expecting to find it under the configuration options… but it’s nowhere to be found. 😩
🔍 “Did I save the T-code somewhere?”
📂 “Was this setting in a table? A user exit? A BADI?”
🤯 “I swear it was here last time!”
Meanwhile, an ABAPer, completely unfazed, leans back and says:
💡 “Why not just add it as a custom node in SPRO?”
🎤 Mic drop.
This is exactly what we’re going to do today—add a custom node in SPRO to make life easier for functional experts, business users, and anyone tired of hunting down object names. Let’s go! 🚀
What is SPRO, and Why Customize It?
- SPRO (SAP Project Reference Object) is the heart of SAP configuration, where functional consultants define system behavior to match business needs.
Why add a custom node?
SAP provides a lot of standard settings, but every company has unique requirements. Adding a custom SPRO node allows users to:
- ✅Access custom configurations in a structured way.
- ✅Avoid remembering T-codes or table names.
- ✅Maintain settings without ABAP intervention.
- ✅Defining company structures (e.g., plants, storage locations)
Overview: Steps to Add a Custom SPRO Node
Before diving into the details, let’s look at the key steps we’ll follow to integrate a custom configuration node in SPRO:
1️⃣ Create a Custom Table – Define the table to store configuration settings.
2️⃣ Generate Table Maintenance – Enable functional consultants to maintain data.
3️⃣ Maintain Some Test Data – Enter sample values to verify the table.
4️⃣ Add a Custom Node in SPRO – Create a new node in the SAP Customizing Implementation Guide.
5️⃣ Add Sub Nodes and link to object(Table) – Make the customizing table accessible via SPRO.
💡You don’t need to create a customizing table specifically; other objects like views or function modules can also be added to SPRO, depending on the requirement. A customizing table is just a common choice for storing configuration data
Let’s make it happen! 🚀
💡Note: During the creation of the table and SPRO Node, a prompt appeared to save the changes in a Transport Request (TR). At this moment, the changes are being saved locally. If it is required to transport these changes to other systems (Quality, Production), it is advisable to save them in a Transport Request (TR), which will facilitate the transportation of the table and its configuration across systems.
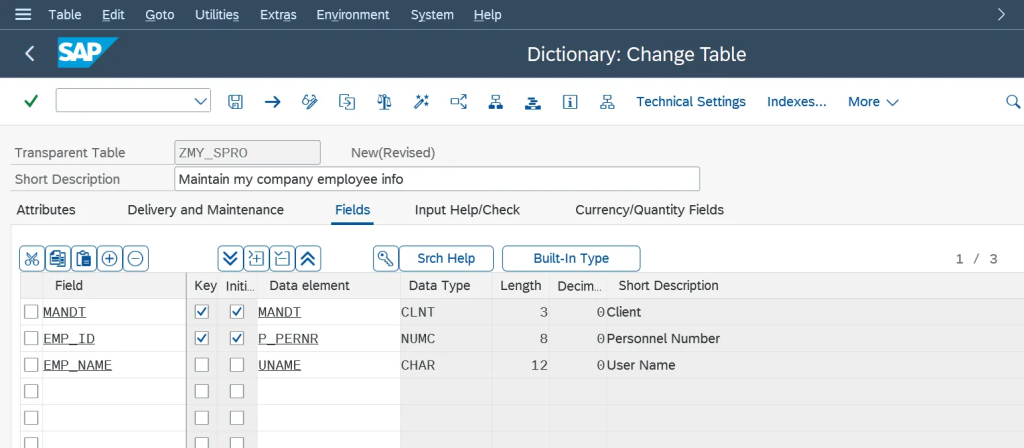
Step 1: Create a Custom Table
- Open SE11 and create a table: ZMY_SPRO
- Set the Delivery Class to ’C’ (Customizing Table).
🔹 Why use a customizing table? Customizing tables store configuration settings and the data is maintained by the customers. They are supposed to contain system-wide or client-wide settings which are supposed to be set in the development system and then get transported into the production system using a customizing transport.
- Define the necessary fields and technical settings.
Step 2: Generate Table Maintenance
- Go to Utilities → Table Maintenance Generator.
- Generate a maintenance view so that it can be updated in SM30.
Step 3: Maintain Some Test Data
- Open SM30 and enter the table name ZMY_SPRO.
- Add some test entries to ensure it’s working.
At this point, we’ve just prepared the ground—the magic happens next. 🎩✨
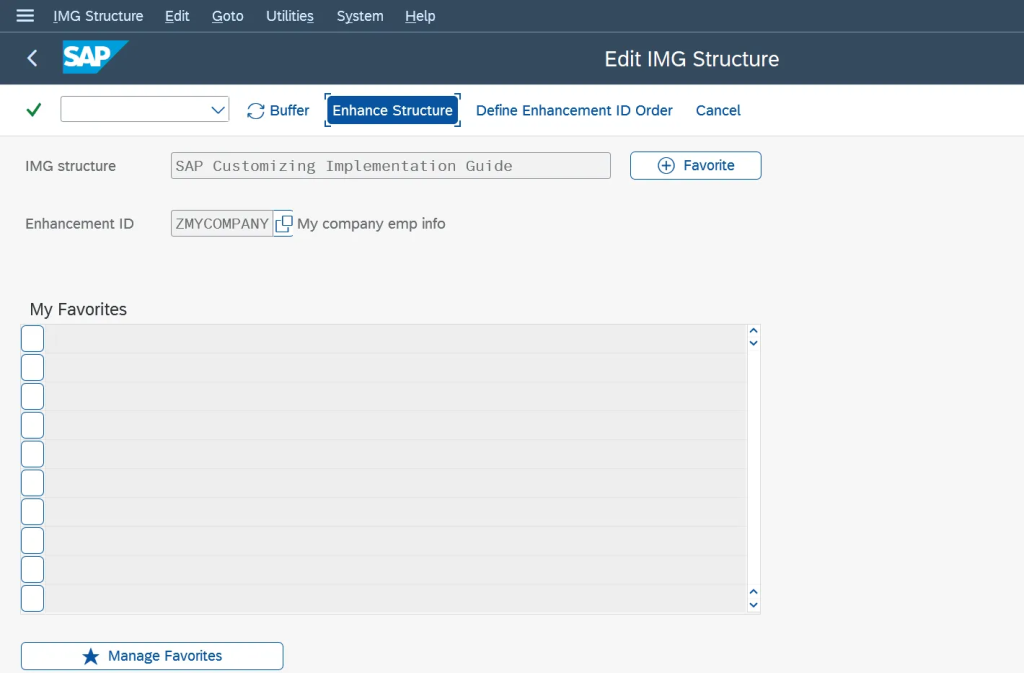
Step 4: Add a Custom Node in SPRO
- Go to SPRO → SAP Reference IMG → SAP Customizing Implementation Guide.
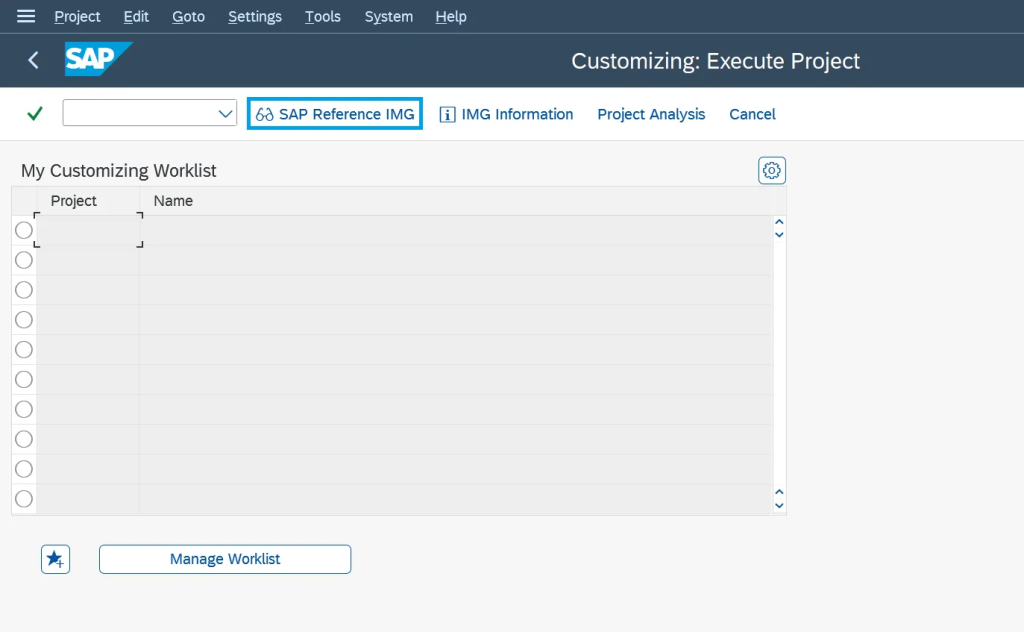
We will be creating a new node under this
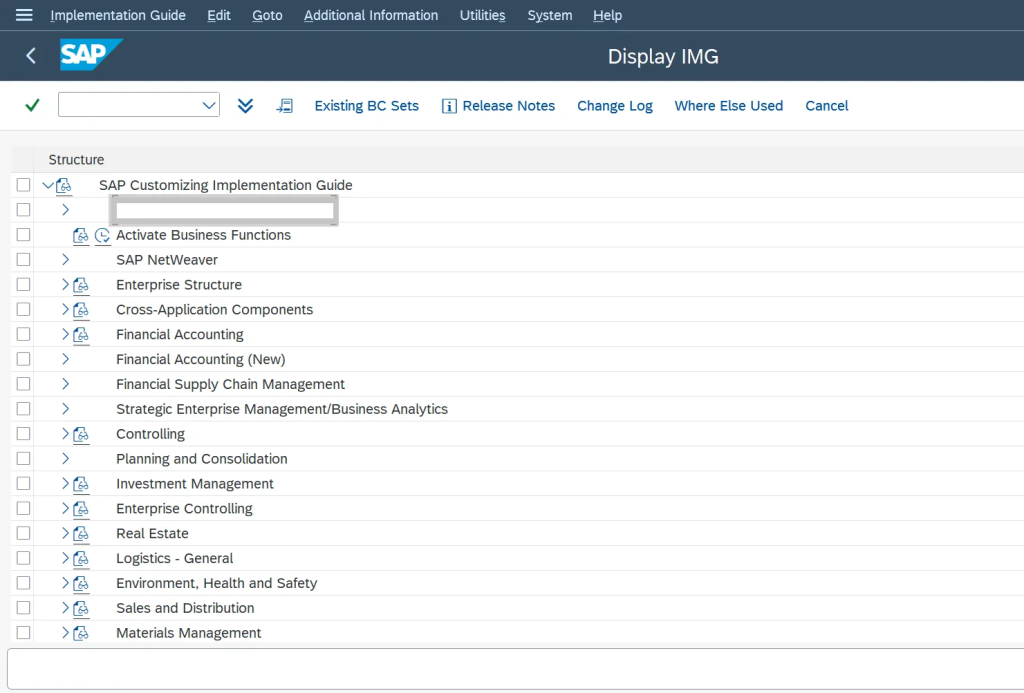
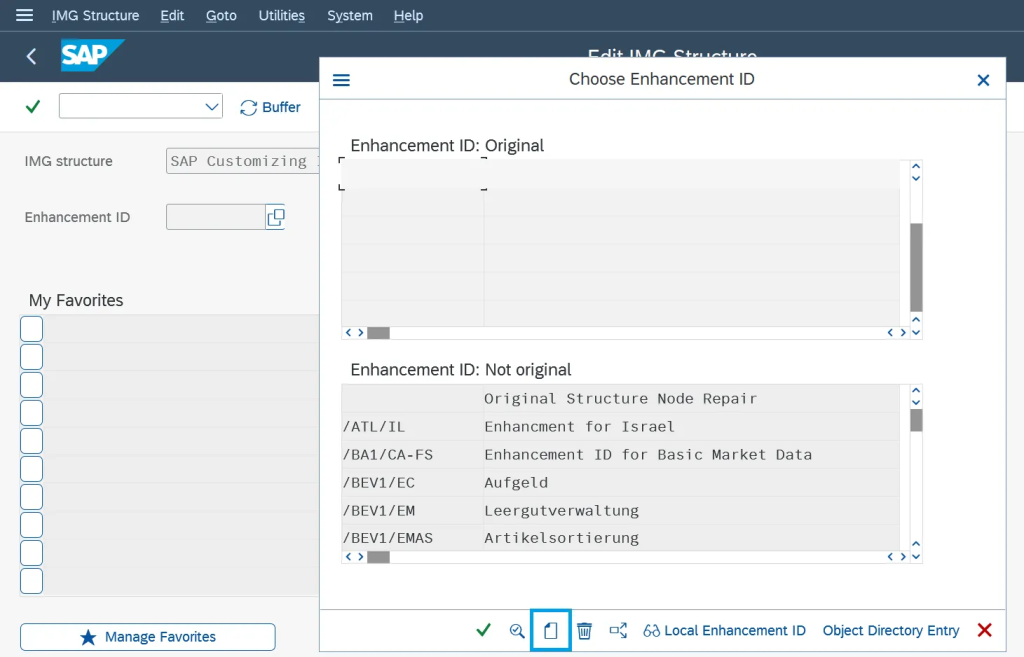
- Open S_IMG_EXTENSION(T-code).
- Press F4 Help and search for the relevant structure (in our case SAP Customizing Implementation Guide) and select the Enhancement ID.
- If no Enhancement ID exists, create one and click Enhance Structure.
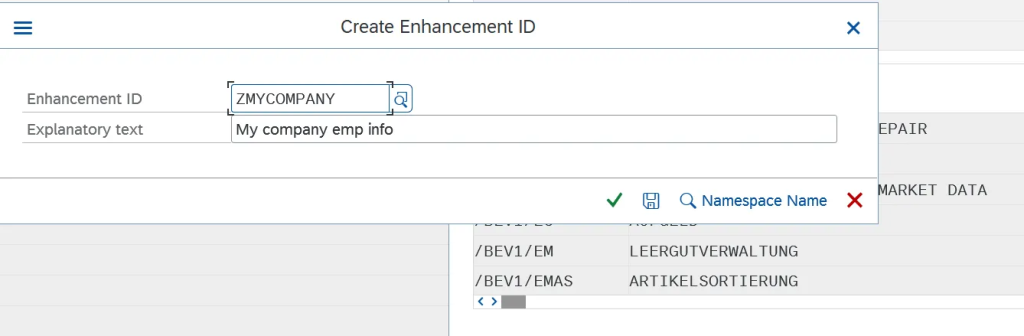
Boom! Your custom node is now in SPRO. 🎯
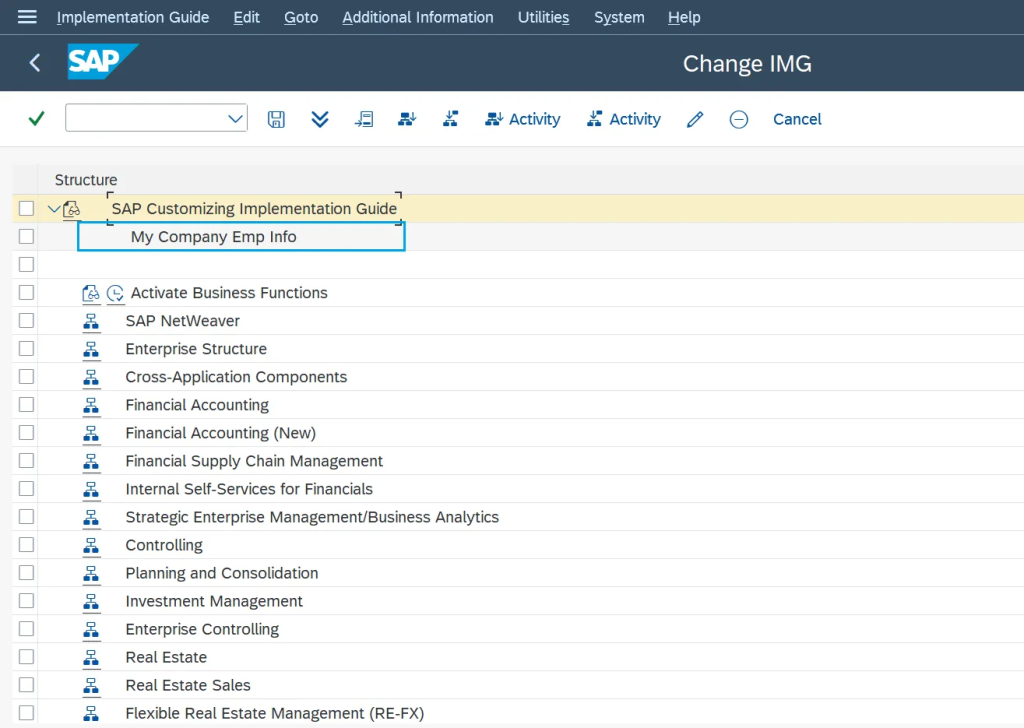
Step 5: Link the Node to Your Table
📝 At this stage, a custom node is being added/enhanced under the SAP Customizing Implementation Guide, we need to link it to our customizing table.
- Select the newly added node and click on Activity(Insert activity as sub node).
If you want to link this node without sub node click on Activity(Insert activity at same level).
Provide an IMG Activity Name and relevant Documentation.
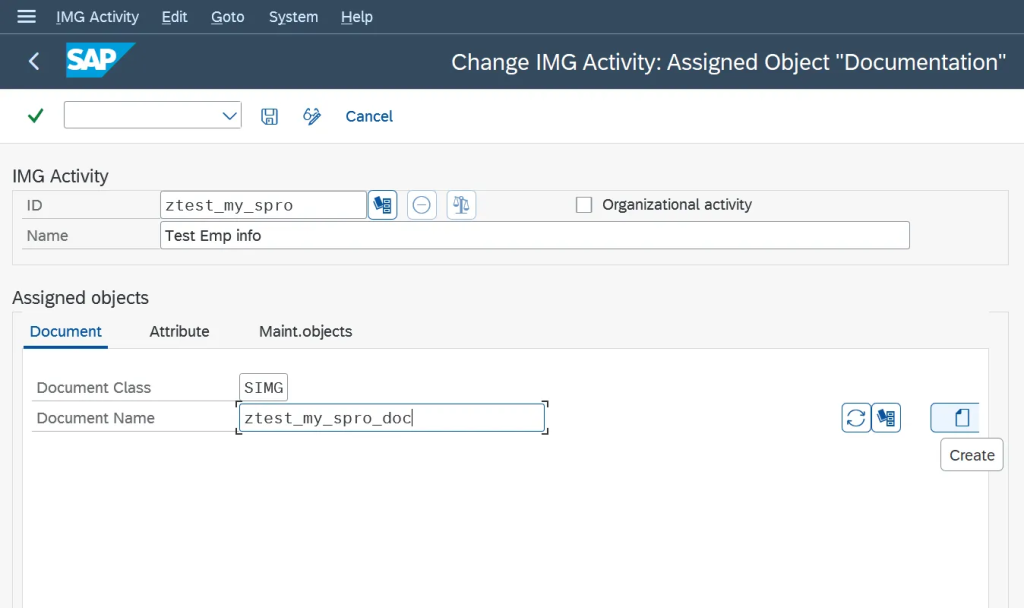
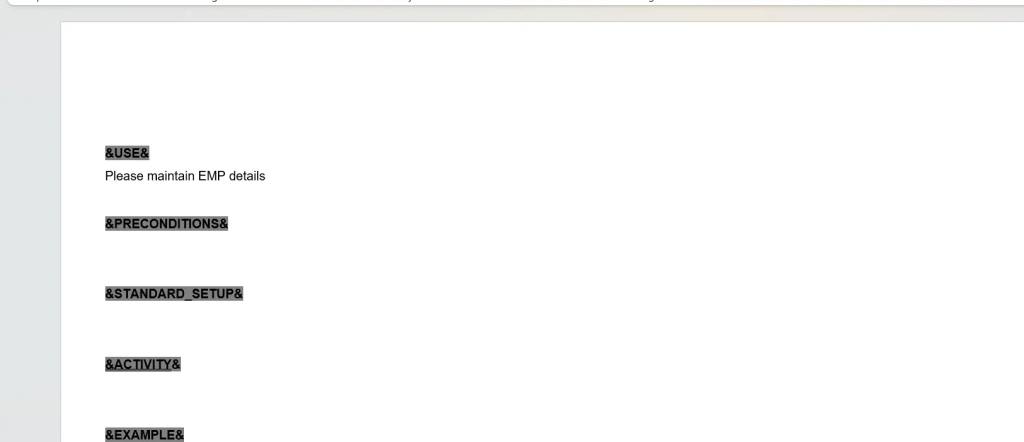
If no documentation exists, create one—it’s always good to add details for future reference.
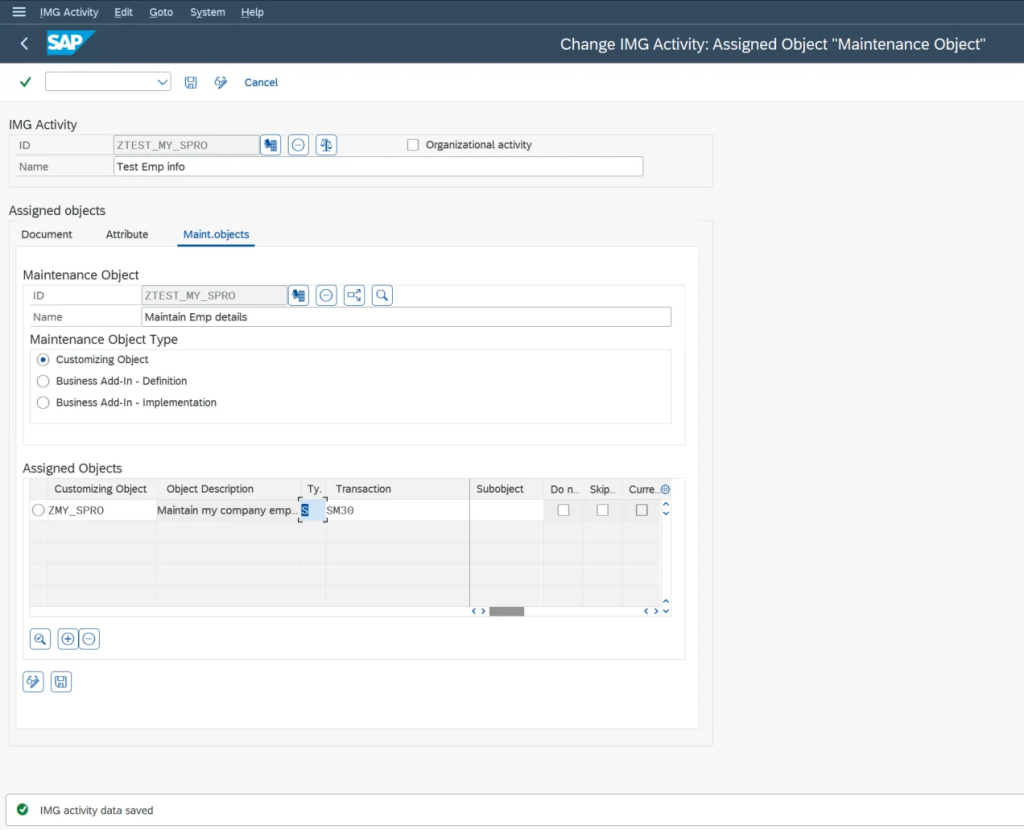
Step 6: Assign the Custom Table to the Node
- Under Maint. Objects, assign ZMY_SPRO as the customizing object.
- Set Object Type to S and Sub object to SM30.
Setting Object Type to S enables table maintenance, linking the customizing object to the SM30 transaction for data management.

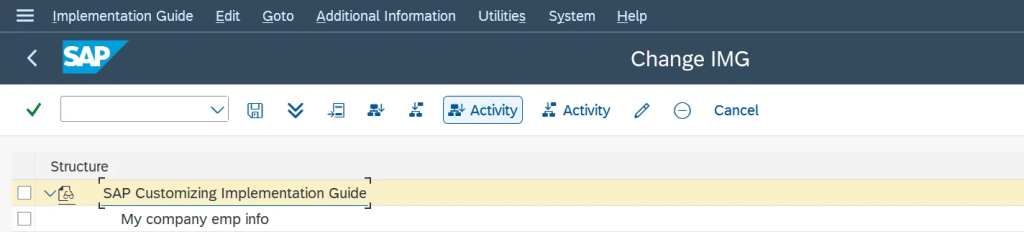
Click Save and we’re done!
At this point, functional consultants be like:

Time to Test! 🚀
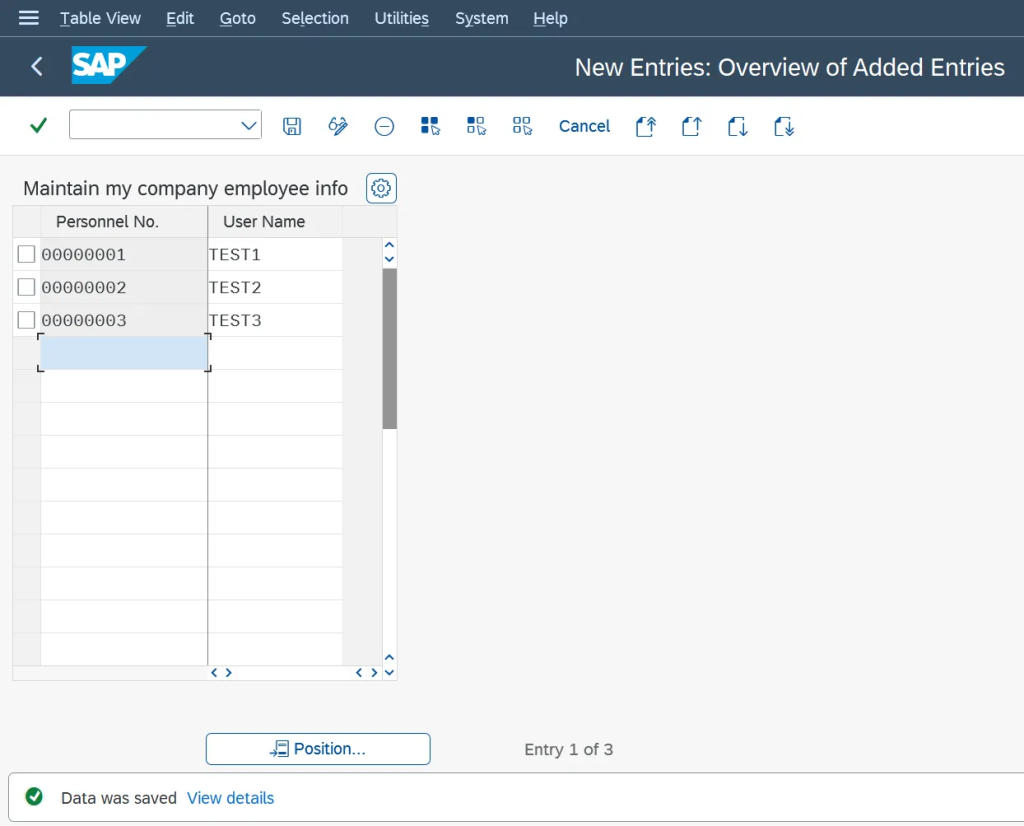
Open SPRO and follow this path:
📂 SAP Customizing Implementation Guide → My Company Emp Info → Test Emp Info
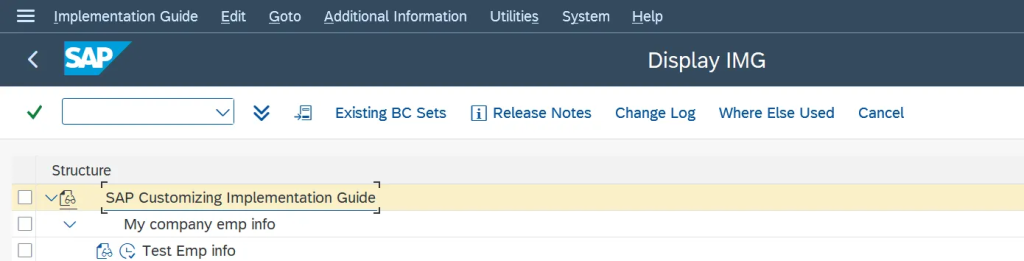
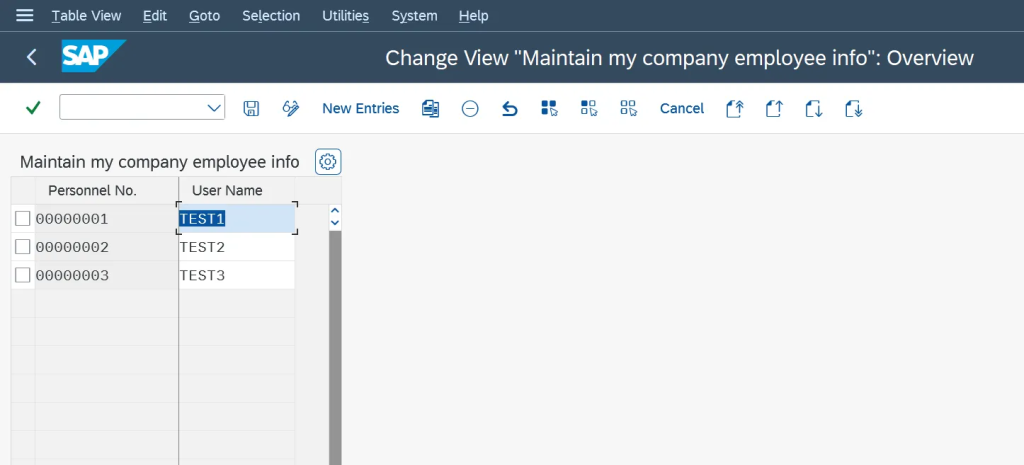
You should now see your custom table directly inside SPRO—no need to recall transaction codes or search for table names. Smooth, right?
Final Thoughts
With this small but powerful customization, we’ve made SAP navigation easier, faster, and more user-friendly. Functional consultants and business users no longer need to scramble for T-codes or documentation—everything is neatly placed inside SPRO.
This is just one of the countless ways ABAP developers add value to SAP systems—so the next time someone asks why ABAPers are essential, just send them this guide. 😉