


Workato is one of the up-and-coming iPaaS options that are available today in the integration world. In this blog, we will be taking a look at the basic components and features supported by Workato when building an integration flow.
About Workato
Workato is a low code/ no code business automation application that aids in the automation of business operations and data integration. It may be used to build and automate workflows, manage integrations, and gather data from a variety of sources. Workato is suitable for both developers and non-developers. It offers a drag-and-drop interface that makes creating processes simple even if you don’t know how to code. A variety of applications can be used for integrating, from sales to support to marketing. Workato also comes with an API that allows you to access many of its features without having to write any code.
Connections and recipes
Workato has an offering of 1000+ SaaS options ready to be used as connectors. What we called iflows in CPI and processes in Boomi are termed as recipes in Workato. In this new up-and-coming iPaaS, the concept of reusability is well supported as you can create inbound and outbound connections and reuse them across your recipes. Every recipe has two main components: triggers and actions. For our practice throughout this blog we will be using a SuccessFactors connection.
Triggers
A trigger is the use of the connection which will be used to fetch data or trigger your flow to begin execution or incorporate a custom API endpoint in your flow – this is where it is done.
Actions
After a trigger, all the steps that follow in your recipe come under actions. You can have an in-app action where you can select querying, upserting, deleting and modifying the data based on the set of options available in the respective app and connection. There are also actions with conditions such as if/else conditions. We also have repeat actions which is basically executing a loop in your flow. Other than these options, Workato also has error handlers and end job shapes that can be suitably utilized. On completing recipe development, we can execute and test run our flow to view the output of the recipe.
Let’s build a recipe
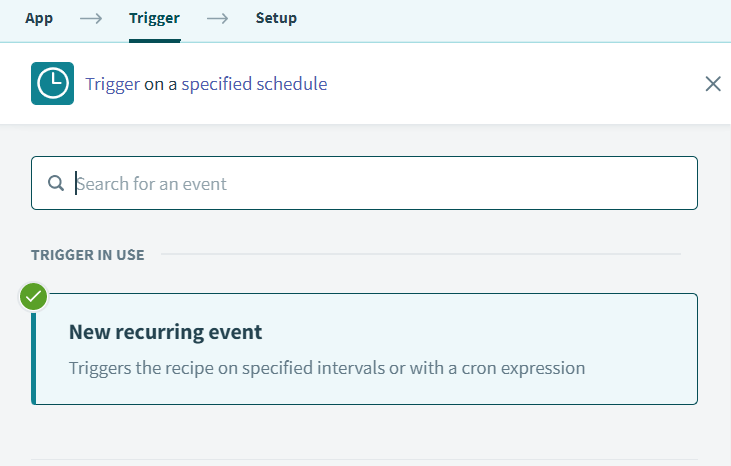
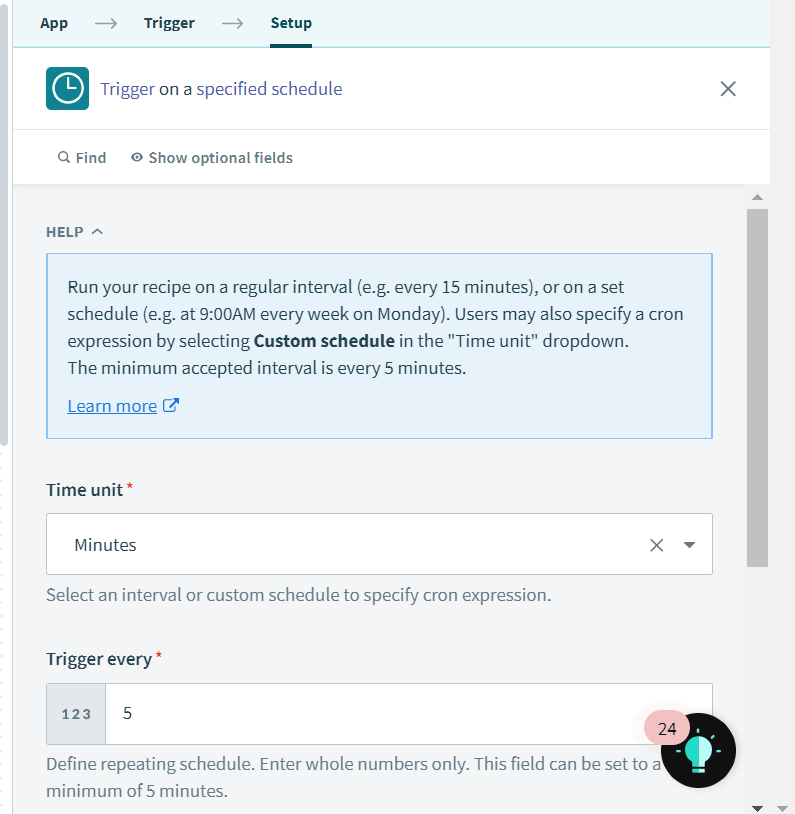
1. Schedule Trigger
When configuring our first step of the recipe – building our trigger, we need to select an app that will be used for our trigger. Workato offers a list of applications that are available to execute a trigger from. For our example, we do not have any dependency on any third party platform so we just make use of a Scheduler app which is an inbuilt application in Workato.
2. Querying Job Information
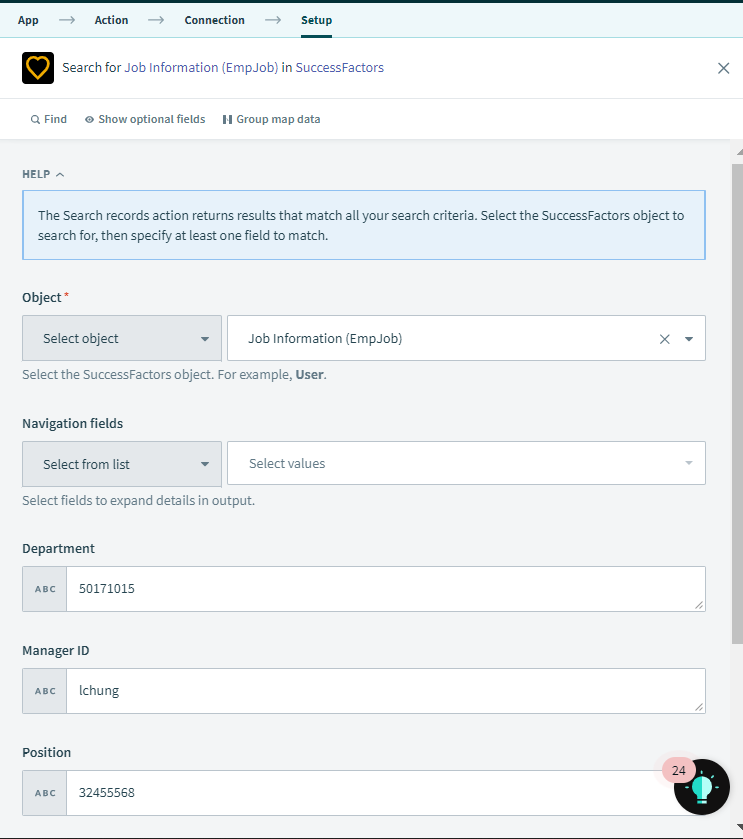
Moving on to our next step, after we have triggered the recipe, we will now be configuring a list of Actions. The first action for us will be querying EmpJob from SuccessFactors. For this we select the Search a record action under the SuccessFactors App. For configuring this step further, we select our search object in the Setup tab and filter out the required fields.
3. Querying Address
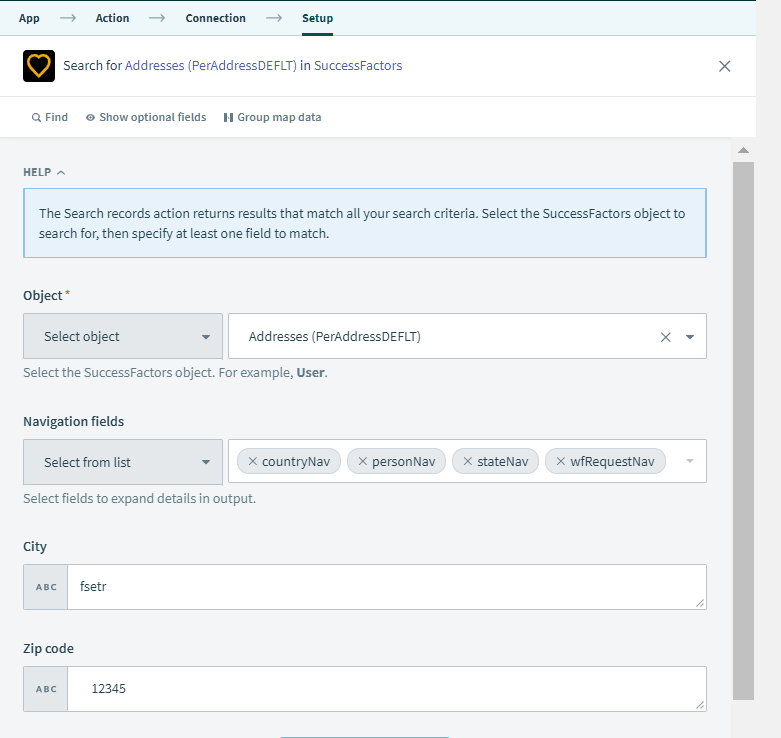
Similar to how we configured our EmpJob query action, we follow the same steps and configure to Search the PerAddressDEFLT object in the Setup tab as our action step number 3 in our recipe flow. As shown below, we can select these objects from a drop down and the navigation fields of our choice can be selected by simply ticking a check box. To specify any further fields we can enter them in text format or reuse pre-existing data pills as suitable.
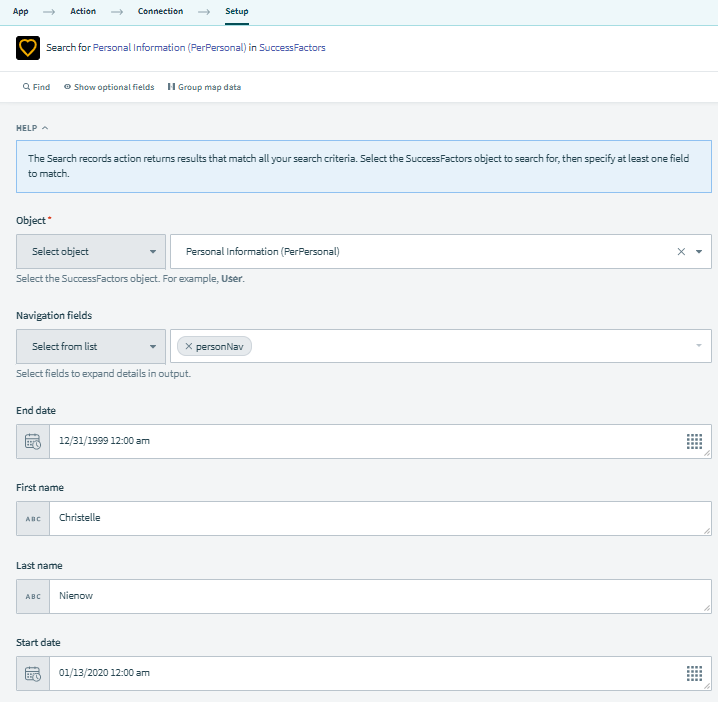
4. Querying Personal Information
We also configure a PerPerson query Action step as shown below.
5. Creating a CSV file
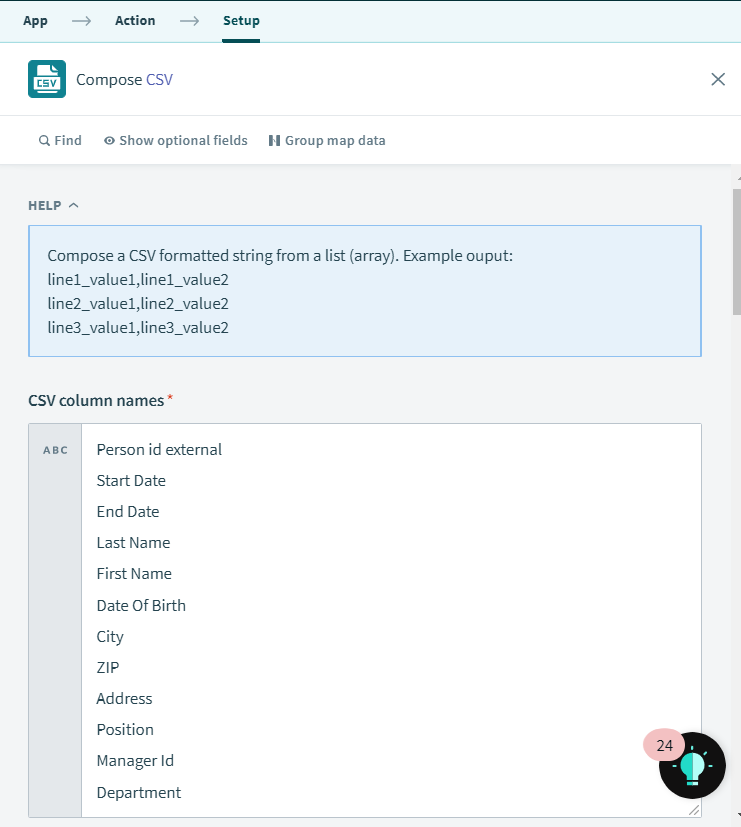
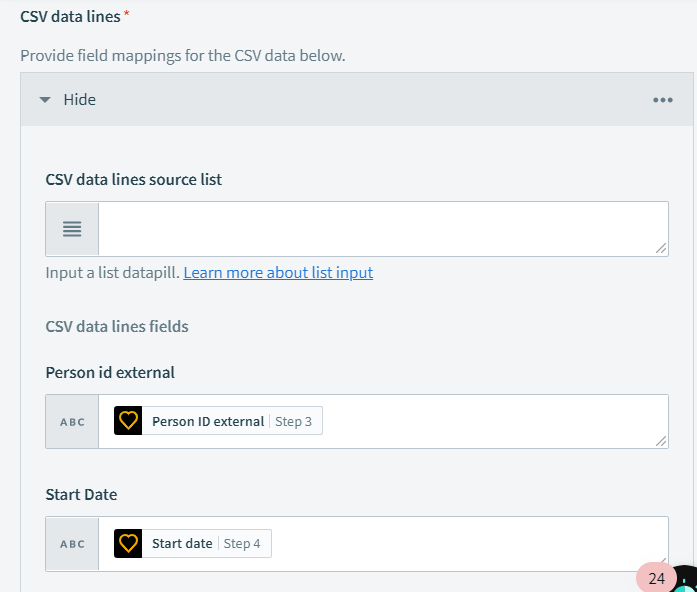
After querying all the necessary objects, we will be building a CSV file where we can collate and organize all the fields obtained thus far as distinct columns in a comma-separated format. The action provided by Workato to establish this is called Compose CSV. Here, we can also specify a different delimiter such as a semicolon. We need to enter the column names in our CSV in the respective text box as shown in the image below.
We then need to map our columns to the fields that we have queried. This is done by obtaining these fields in the form of data pills from previous steps of the recipe and dragging and dropping the pills respectively at the newly formed fields created in the Setup tab. These fields are created dynamically just as we enter them on in our CSV Column Names text area.
We can also incorporate some functions if we wish to perform an operation on any of our fields before sending them over to the destination. For example, when we want to concatenate the Addresses, we can just use a “+” between the data pills when mapping it to the Address column value as shown below.

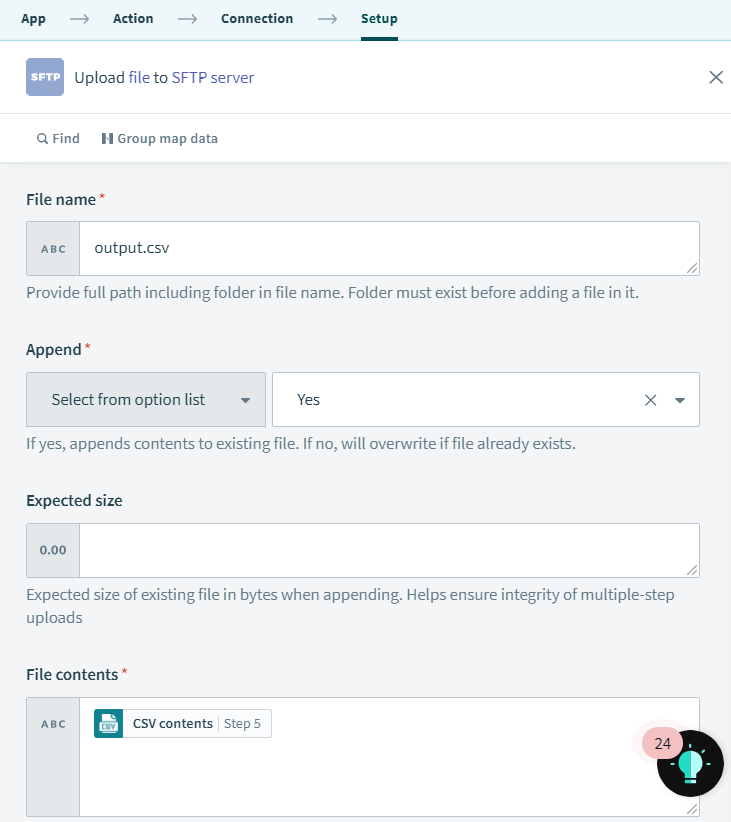
6. Sending data to SFTP
When sending over data to a destination SFTP server, we can make use of the Upload file to SFTP server action where we need to configure the connection to the SFTP server first and make sure that it is valid and active. Once that is done, we must specify a couple more fields as shown below. Here, we also add in our CSV file that we obtain from the previous step so that it can be mapped to our SFTP file Action.
With this, our final recipe should look something like this:
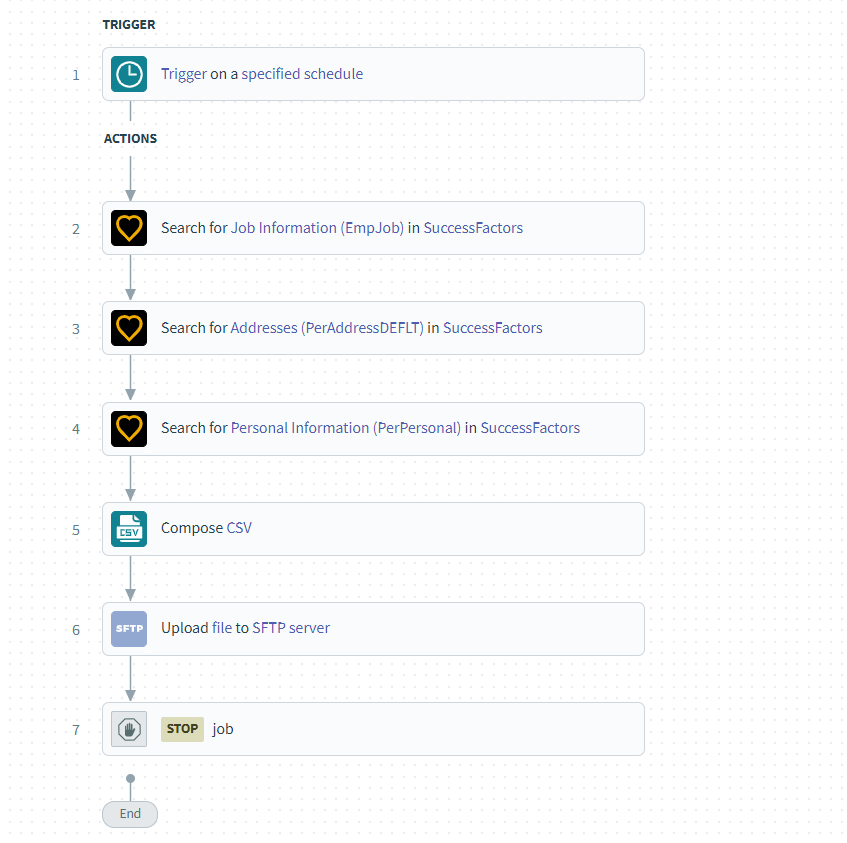
In this blog, we have covered triggers, SuccessFactors querying objects, Workato CSV offerings and SFTP connections. To help you get a speedy start on your Workato journey, we have made this recipe available in Workato community here.
There are a number of other features available on Workato. Some of these features include recipe functions – to perform a repeatable set of actions with ease, using RecipeOps for monitoring your recipes, building custom actions with HTTP based APIs or custom connections using custom fields for SDK connectors. A lot can be accomplished with Workato as your integration partner and the iPaaS is only getting better with its community, shared library of resources and dedicated guidelines and documentation at the Workato Automation Institute. So, just go ahead and start exploring!