


Hello Technophiles!!
Welcome to the third part of our blog series on ABAP RAP. In the first two parts, we had discussed various programming models of ABAP, learned about ABAP RAP, devised an approach for our scenario, and divided it into seven steps. We also looked at the first two steps of our solution. If you haven’t gone through our previous blogs, we recommend you to first go through the same, understand the scenario and implement the first two steps as described here.
Not all third parts are bad
In this post, we are going to discuss the third and fourth steps:
- Creation of a package for storing project resources.
- Creation of three tables along with a data element which will be used across these tables..
- Employee information: to store basic information about an employee.
- Employment information: to store employment components like date of joining and salary.
- Position information: to store position related information (this will be used as Value help/Check Table).
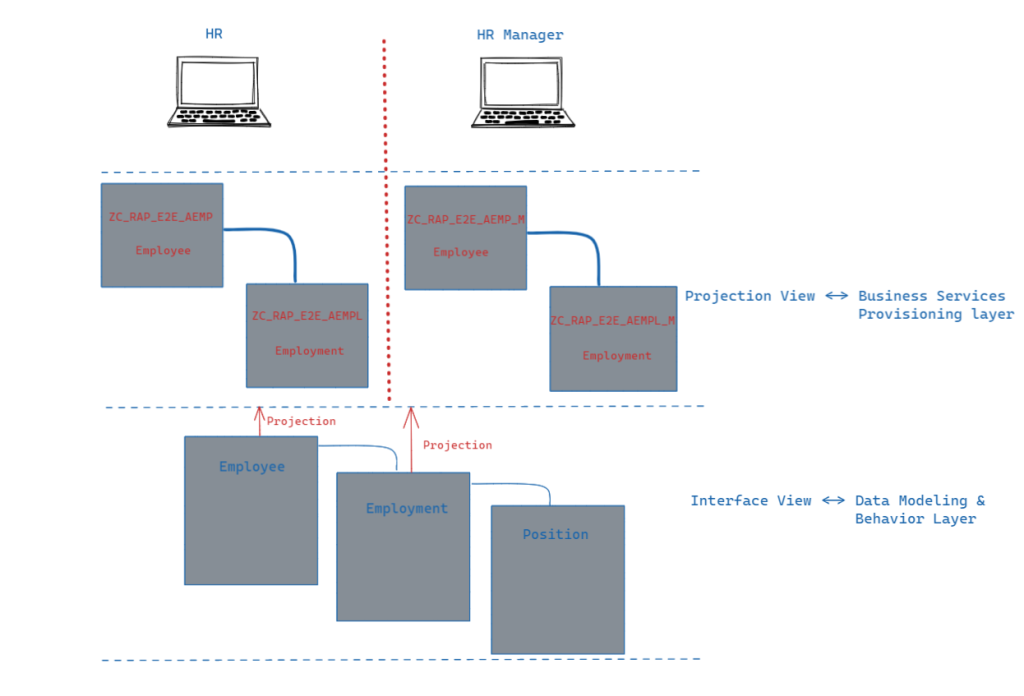
- Creation of a CDS interface view for creating a basic view without any extensive information which can be used by various services.
- Creation of a CDS Projection view exposing a subset element of CDS interface view. It is service agnostic.
- Creation of metadata extension for UI elements and Creation of Behavior definition and projection for defining the action possible on the service. Example- Create, Update, Delete, determination etc.
- Creation of Behavior implementation for writing the business logic related to action such as validation, action and determination.
- Creation of Binding service for defining the protocol used by the service. Example- OData V2 – UI, OData V2 – WebAPI etc.
- Expose the service.
Overview
- Creation of CDS Interface View
- Creation of CDS Projection View
Please make sure you check the GitHub Repository.
Creation of CDS interface view
Before looking at the creation of interface views, we need to understand what they mean and what purpose they serve. So here we go!!
In CDS (Core Data Services), interface views are those views that are created on top of database tables It is not supposed to do anything complex. A basic interface view is used to select data from a single database table and does not make any change/calculation on any database table.
Purpose of interface view :
- It is used to mirror the database table in the form of a CDS view.
- helps in transforming the technical names of a database table into citizen agnostic readable names.
- composition and association between different interface views can be created.
Now that we have learned about interface views, let’s get straight into how we can create one.
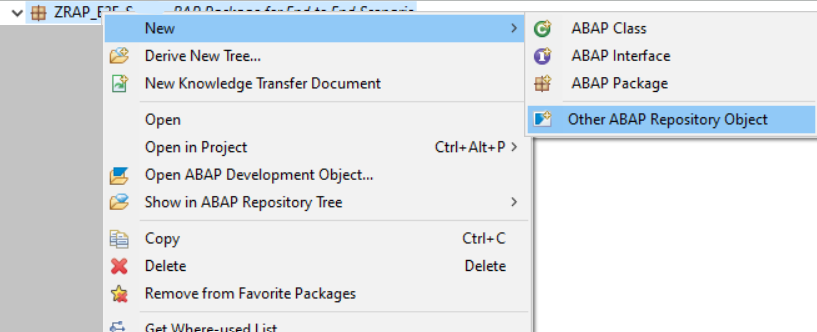
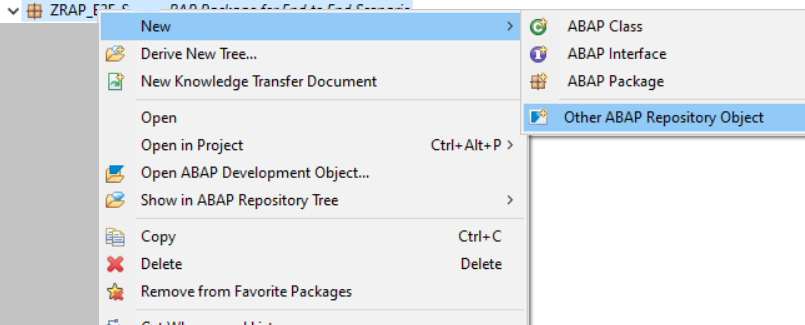
- Right click on the package created and go to New → Other ABAP Repository Object
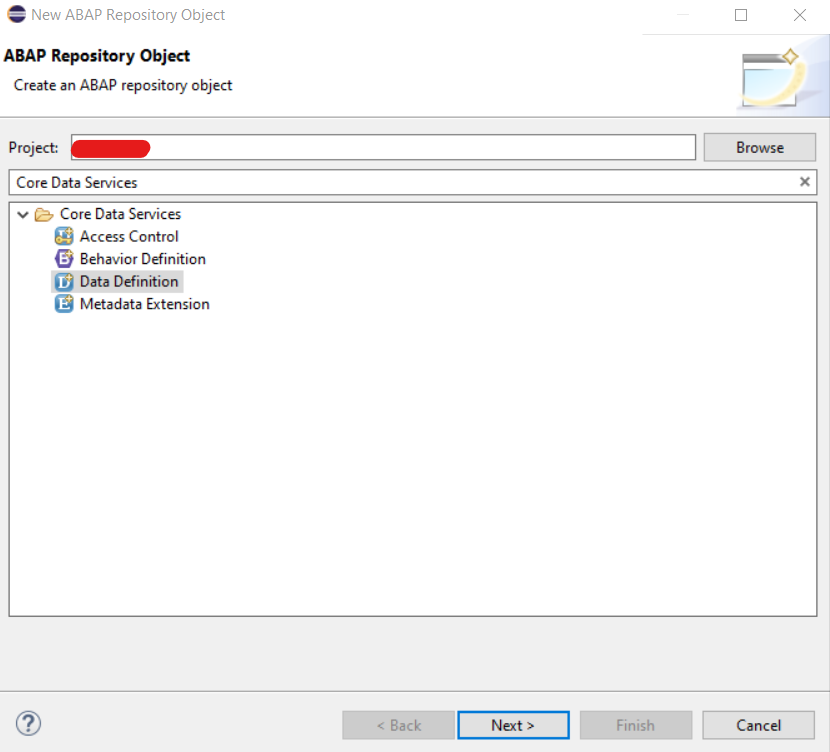
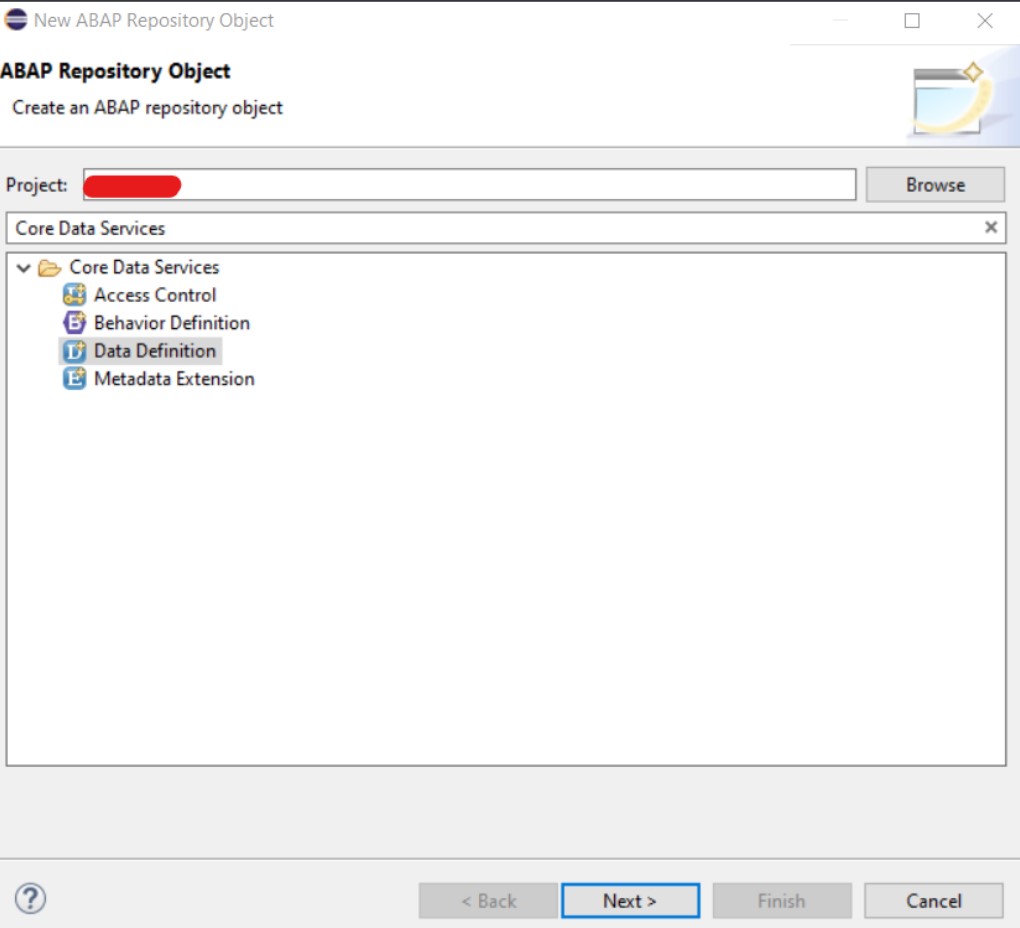
- Look for Core Data Services and choose Data Definition. Click on Next
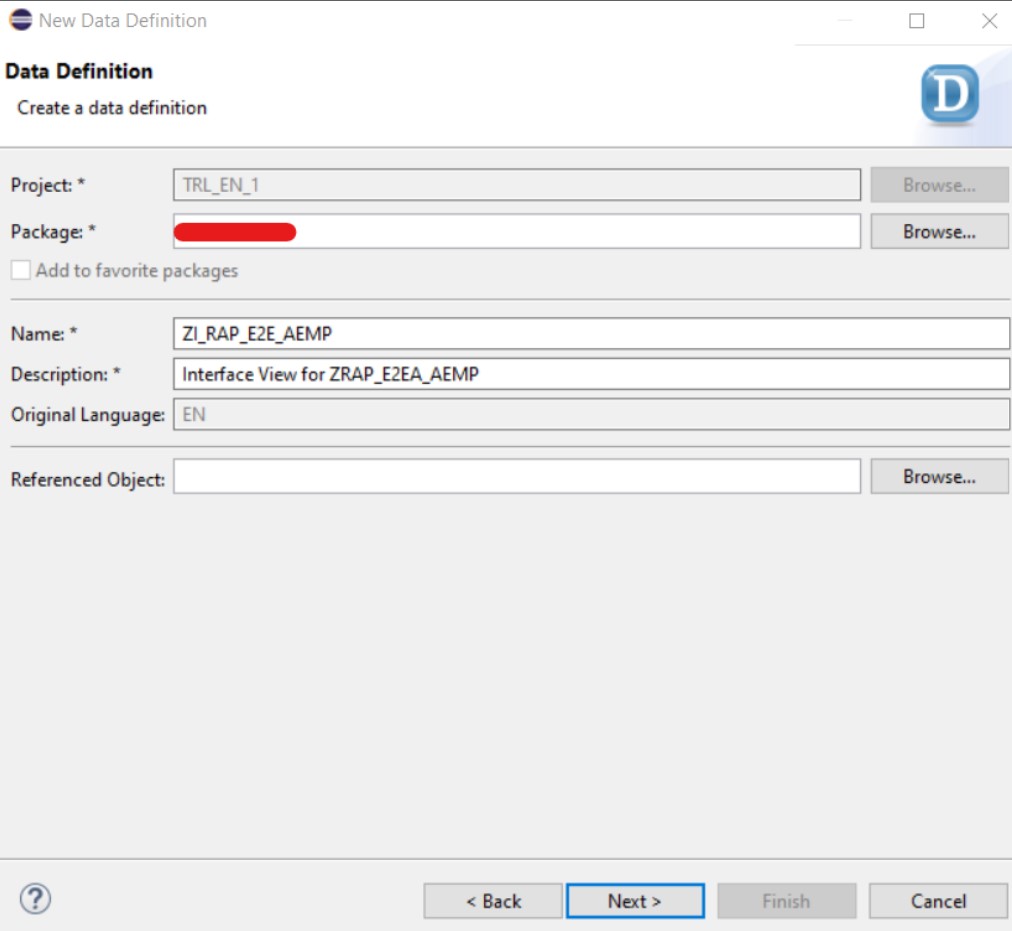
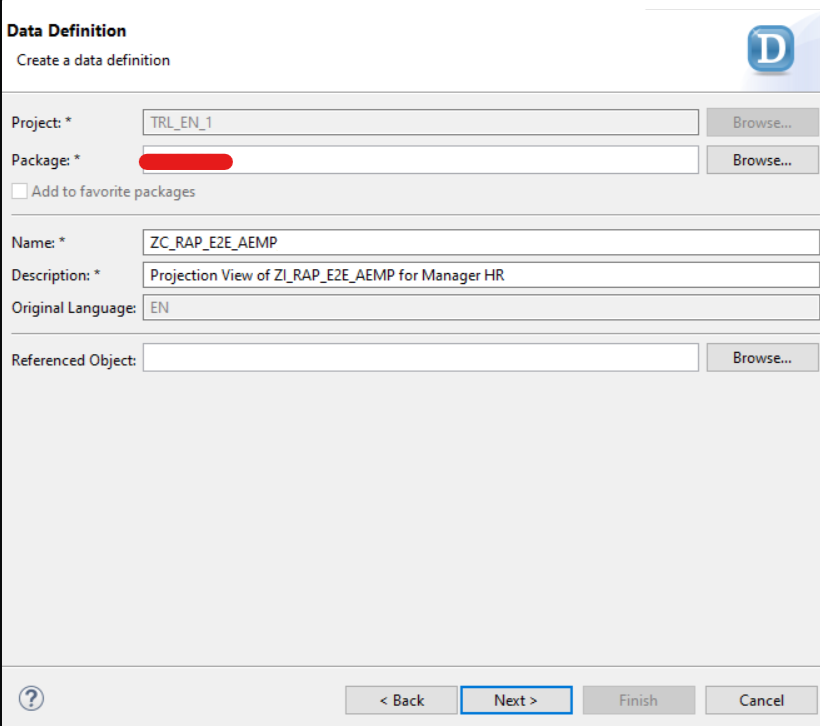
- Give appropriate name and description for the interface view and click on Next → Finish.
- You will get an outline for this interface view and can enter the below code for it.
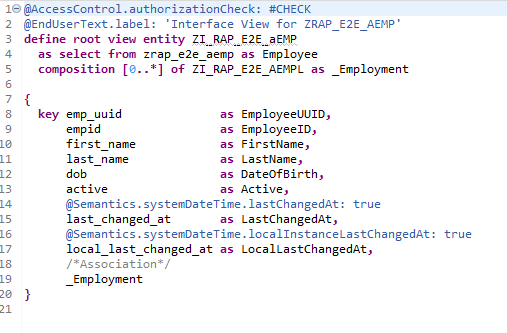
Note: There will be three interface views, one for each table we created in earlier blog so that they can be used in the further development.
Creation of Projection View
Now let’s see how one can create a projection view.
Projection view is used to mask unnecessary fields and display only fields which are required. This provides flexibility in the consumption of service as the same business object can be extended.
Projection view are service agnostic, meaning, for different services different projections have to be created. For example, we will create two services, one for HR and another for HR Manager and for each we will have different projection.
- Right-click on the package created and go to New → Other ABAP Repository Object
- Look for Core Data Services and choose Data Definition. Click on Next
- Give appropriate name and description for the projection view and click on Next
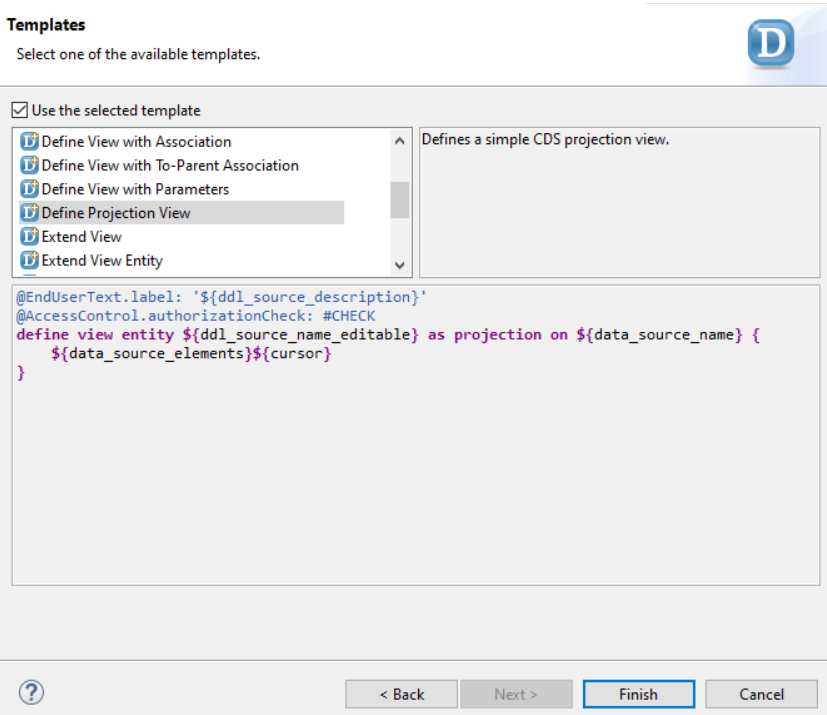
- Select a TR and go to the next step and choose ‘Define Projection View’ → Finish
- For the final part, add the below code for projection view
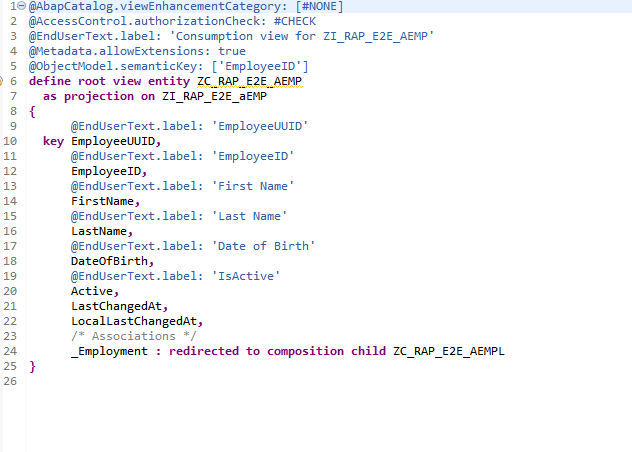
Note: There will be four projection views in total for two different database tables.
With this, we come to the end of this blog part. We have completed the third and fourth steps of our solution. Let’s now take a break here and digest these steps better. In this blog post, we implemented two more steps for our hands-on scenario on hiring. We also understood the use and application of interface view and projection view.
In the upcoming parts of our blog, we are going to learn about behavior definition, behavior projection, and behavior implementation. Stay connected and keep learning with us.
That’s it for now, we’ll continue on our journey of learning ABAP RAP soon. Till then, goodbye and happy learning!!
Hold on, did you forget to check out the GitHub repository??
Don’t worry, we won’t let that happen.

Here is the link for you. Just go there, understand each step more clearly and enjoy!!