Hello Integration Enthusiasts!
Welcome to the third part of Enterprise Integration with Dell Boomi. In the first 2 parts (read here if you haven’t), we had established our integration scenario, divided the approach into 7 steps and also discussed the first two steps of the solution. In this post, we are going to discuss the third step:
- Obtain the list of products
- For each product in the list, identify if reordering is required
- If product must be reordered, obtain supplier info
- Create a list of the products to be reordered along with supplier info
- Convert List into csv format
- Send List to Manager via Email
- Configure the Process to run every day
Step 3: If product must be reordered, obtain supplier info
At this point, every document flowing through the process contains details of one product each and we will now obtain details of Supplier for that product. We had achieved this in SAP CPI, using a content enricher. In Boomi, we’re going to do it a little differently.
Obtaining Supplier information is very similar to obtaining the list of products that we did in Step 1. But instead of obtaining a list of products, we want to obtain supplier information for every product that is to be reordered.
Step 3.1: Add Shape on Canvas
We use another OData client to achieve this. Follow the same steps as discussed in step 1 to an OData Client shape in the process. In step 1, we had created a connection to Northwind. We do not need to create another connection, as we can reuse the one we had created before.
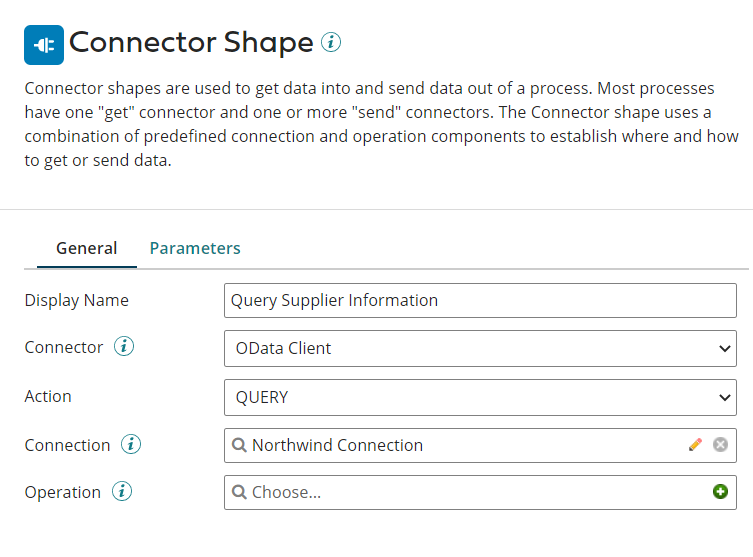
In SAP CPI, connection reuse would not have been possible in this manner. Instead, we could have used the same parameters in the connectors by externalizing them, so that change in that parameter would have reflected everywhere it was used.
Step 3.2: Add/Select Operation
Coming back to Boomi, we will need to create a new Operation for this connector as we are going to query on a different object, i.e., Suppliers.
Click on the green plus icon in the operation drop down box and you’ll get a screen like this:
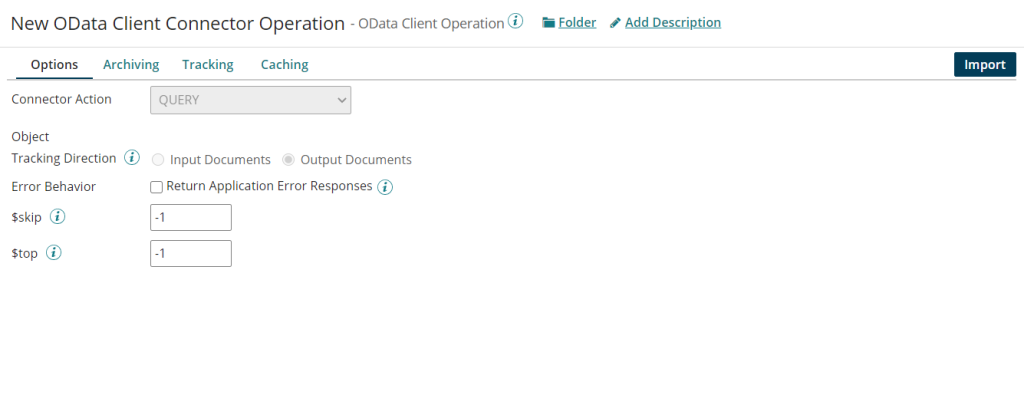
Click on Import Button towards the right side of the screen.

OData Client Import Wizard will pop up. Choose an Atom for executing this request, select the connection we had created in the previous step and click on Next. Note that we also have the option to put filters if we wish, but it’s not mandatory.
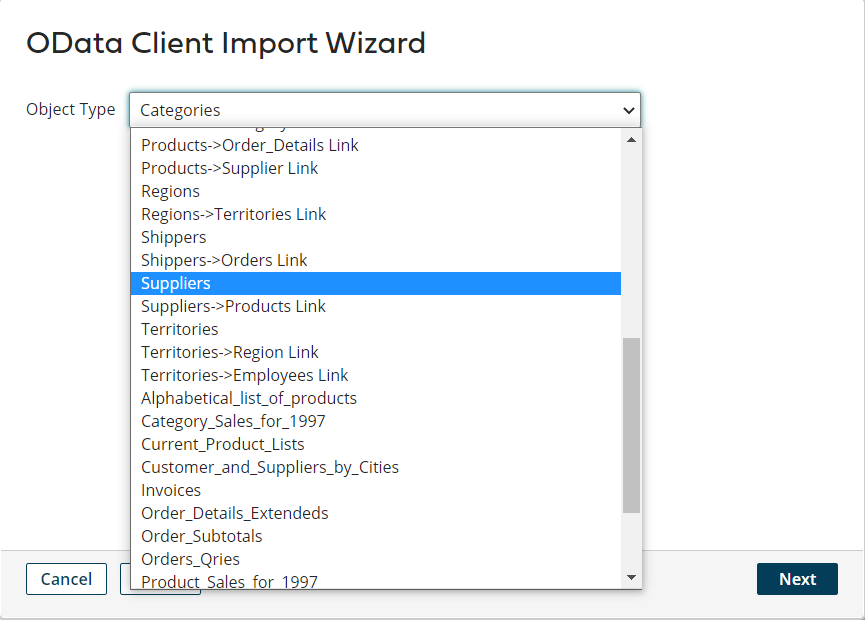
In the next screen, Select Suppliers from the drop down box click on Next. Review your selections and click on Finish. We have now successfully selected the object for which we want to obtain details. Now, we must select the Response Profile for this operation. Click on the input control associated to Response Profile to select and navigate to the project folder, You will find the response profile for our query operation there.
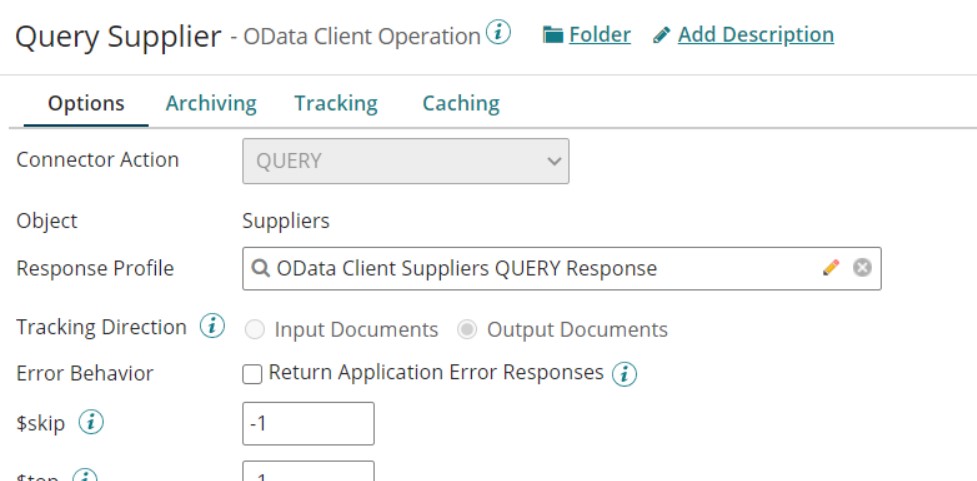
At this point, we have specified the OData service to be used, the object and the response profile expected. Now, we must specify which fields should be queried and query filters.
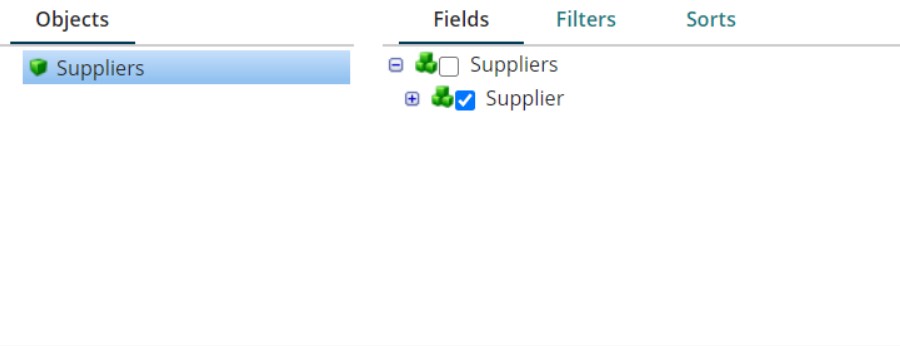
We will find these options towards the bottom of the screen. Click on Fields tab to select the fields that we want to be included in the response. We’re going to select the entire Supplier object as we want all fields in the response.
Like we had discussed in the first blog, we must set filters so as to specify the Supplier whose details are to be fetched. This is going to be simpler than the filters we had set for obtaining list of products as we simply have to fetch details based on Supplier Id already stored in a profile element.
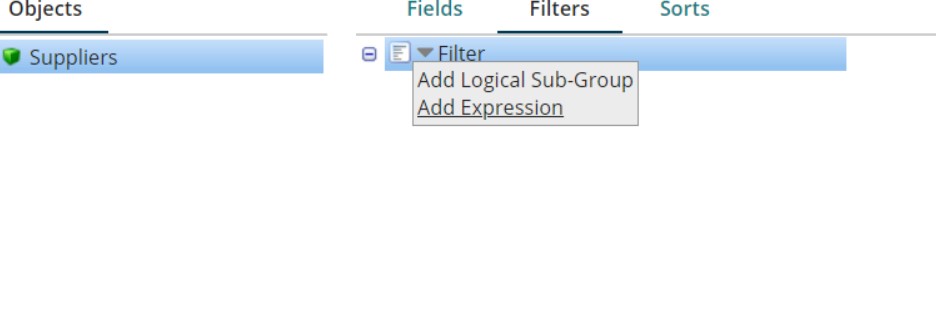
Click on the dropdown icon next to Filter and then click on Add Expression. Click on the expression and give it a proper name for Identification. We are going to name it as ‘Supplier Id’.
Next, we are going to choose the field on which this filter is to be put.
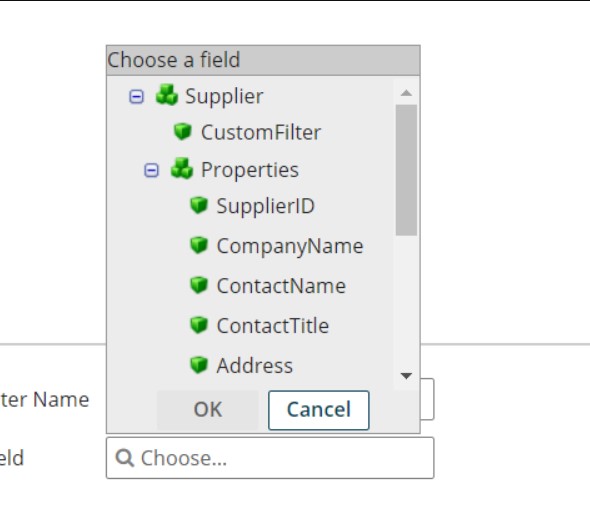
Choose ‘SuuplierID’ under Properties. We are going to choose the operator as Equals. This completes the filter configuration. Later on, we will specify a parameter which will be tested against this condition. After configuration, this is what the filter looks like:

Now click on Save and Close.
Step 3.3: Configure Parameters
Now we come to the final step of query formation, addition of parameters. Go to the parameters tab of the connector shape.
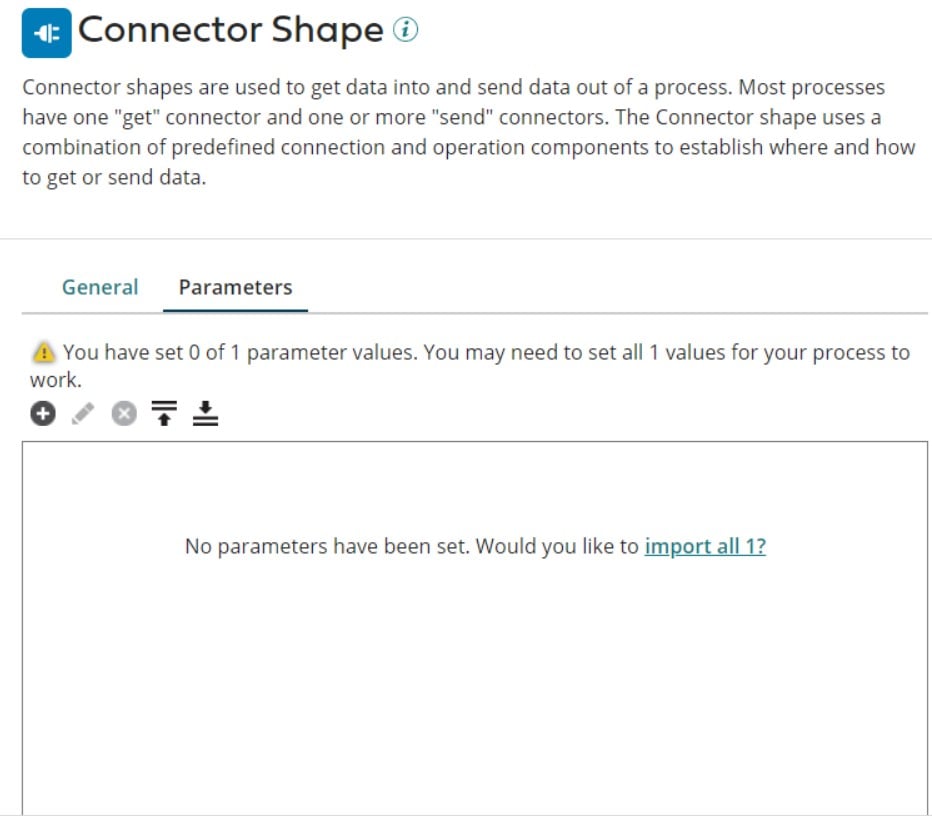
Here, you will see a prompt to import the parameters that we had specified in the previous step. This is an easy way to set parameters. Another way to go about it is to click on the Add Parameter (+) button . Using the dropdown marked as Input, choose the name of the parameter that you want to specify value for.
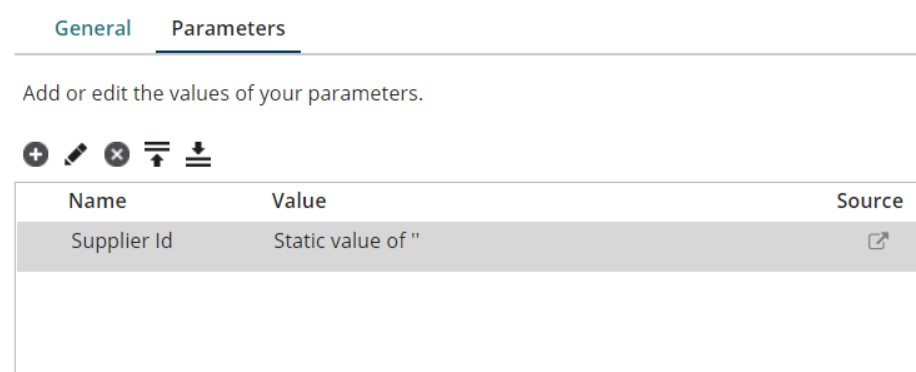
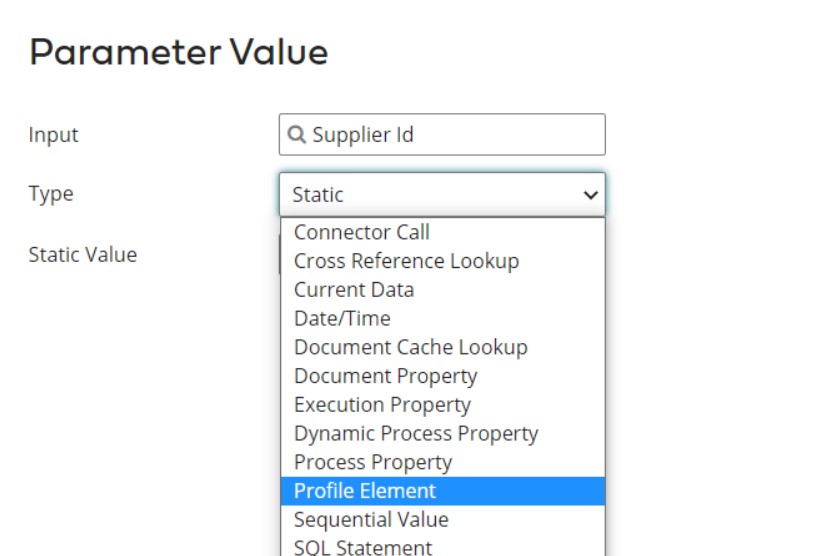
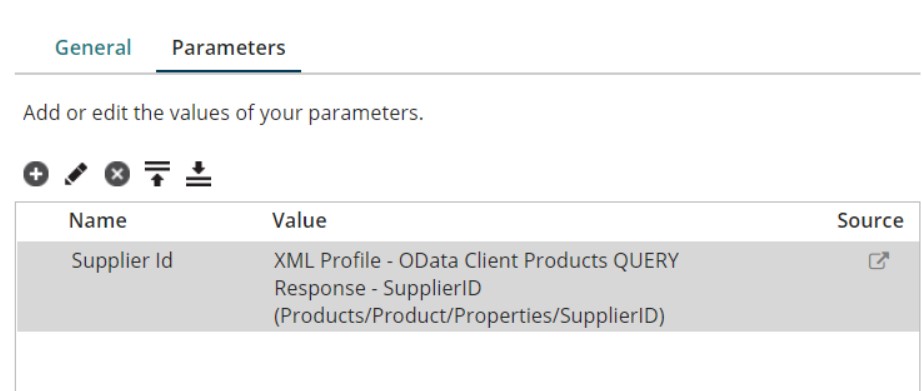
After this parameter is imported, double click on it to change it’s type and value. Select Type as ‘Profile Element’. We are going to select the profile which corresponds to Product Information. After that, we will specify the field which contains Supplier Id so that it can be matched with the filter we had set in the previous step.
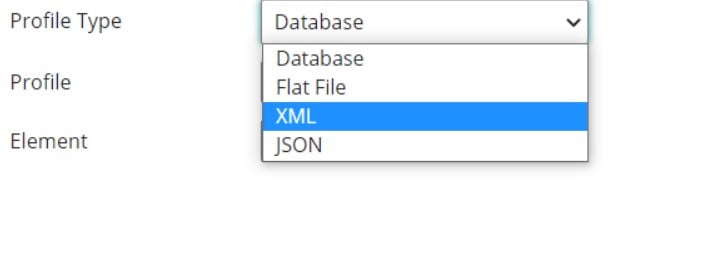
Since the product data is in XML format, select the profile type as ‘XML’.
Now, from within the project structure, select the profile that was created for products. Also, we will select the profile element ‘Supplier Id’.
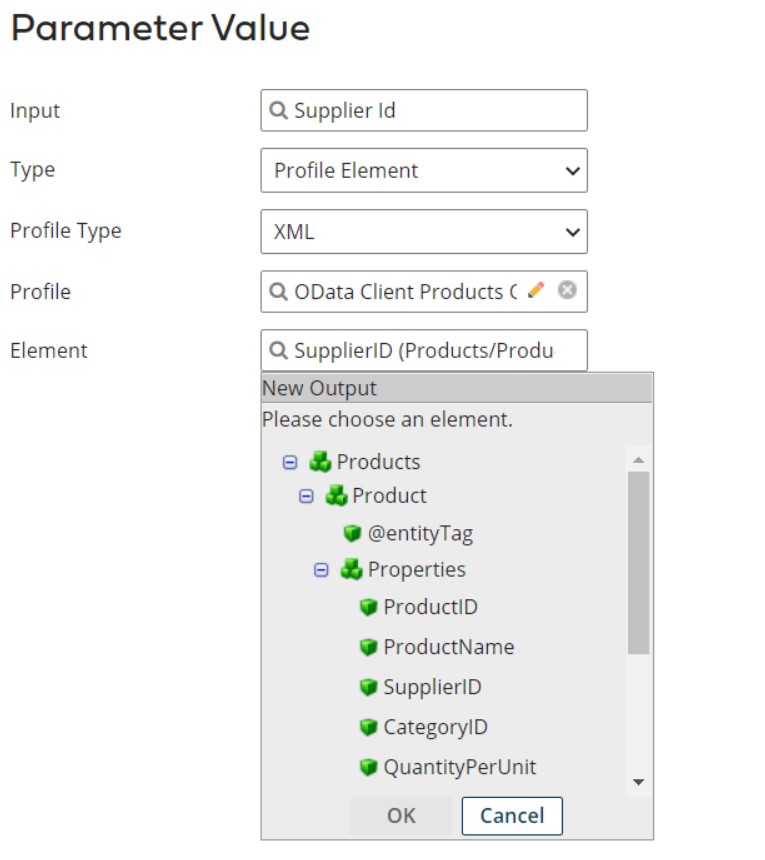
After completing configuration, this is what the parameter should look like:
Do not forget to connect this shape to the previous shape we had created.
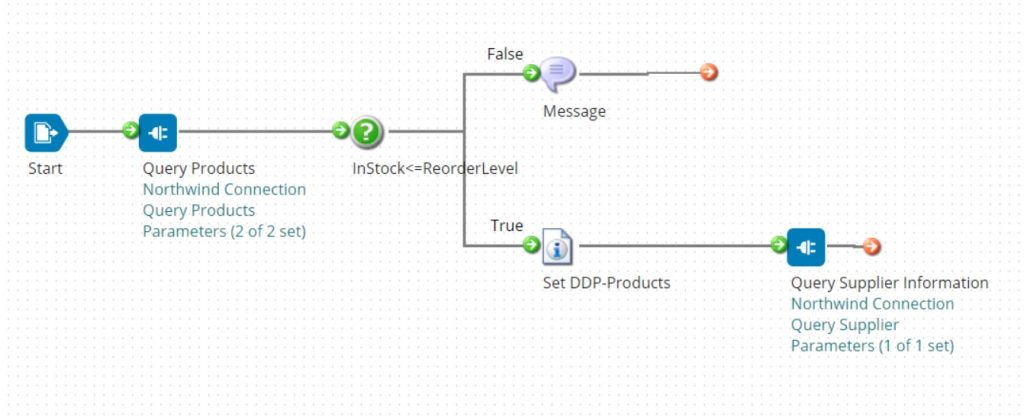
This is now ready for testing. You already know how Test Mode works so we will not discuss that again. Once the entire process is built and configured we will deploy it to an Atom.
If you’re looking to manage these integrations from your mobile device, then you can also download TriggerIT for Boomi. It’s available on both Apple and Google Play Store for free usage.
Conclusion
In this Blog Post, we completed the third step to our solution. We looked at Connector shape again and configured it to fetch Supplier Details. We also learned how to set parameters using profile elements. At this point, you should feel quite comfortable in using Connector shape in your processes. If not, that’s alright, just keep experimenting with this shape and you will master it in no time.
That’s it for now, we’ll continue on our journey of learning Enterprise Integration soon. Till then, Goodbye and happy learning!

