


Hello technology hitchhikers!
Welcome to the final part of Enterprise Integration with SAP CPI. In the first three parts ( 1, 2 & 3 ), we established our integration scenario, divided the approach into 7 steps and also discussed the first 4 steps of the solution. We learned about Message events, Start Timers and some scheduling options, Request Reply shape, Groovy Script Shape, General and Iterative Splitters, Content Enricher and Content Modifier while creating our integration flow.
In this part, we are going to discuss the remaining steps:
- Configure the Integration to run every day
- Obtain the list of products
- For each product in the list, identify if reordering is required
- If product must be reordered, obtain supplier info
- Create a list of the products to be reordered along with supplier info
- Convert List into CSV format
- Send List to Manager via Email
5. Create a list of the products to be reordered along with supplier info
(Technical concepts used: Content Modifier)
Till now, we have gathered the details of the products that need to be reordered along with supplier information for those products. The resulting data looks like this:
The first thing we need to do is to add enclosing tags to this list so that it’s in a valid XML format and ready for conversion to CSV. We do this by using a content modifier. Add a content modifier between the Gather shape and End Message shape. 
To add enclosing tags, simply set the message body in this content modifier as shown below:
After passing through this shape, the message body looks like:
<ReorderList>
	<Product>
		<CategoryID>8</CategoryID>
		<Discontinued>false</Discontinued>
		<UnitPrice>25.8900</UnitPrice>
		<ProductName>Nord-Ost Matjeshering</ProductName>
		<QuantityPerUnit>10 - 200 g glasses</QuantityPerUnit>
		<UnitsOnOrder>0</UnitsOnOrder>
		<ProductID>30</ProductID>
		<ReorderLevel>15</ReorderLevel>
		<UnitsInStock>10</UnitsInStock>
		<SupplierID>13</SupplierID>
		<ContactName>Sven Petersen</ContactName>
		<ContactTitle>Coordinator Foreign Markets</ContactTitle>
		<CompanyName>Nord-Ost-Fisch Handelsgesellschaft mbH</CompanyName>
		<Address>Frahmredder 112a</Address>
		<Phone>(04721) 8713</Phone>
		<PostalCode>27478</PostalCode>
		<Country>Germany</Country>
	</Product>
	<Product>
		:
		:
		:
	</Product>
</ReorderList>
6. Convert List into CSV format
(Technical concepts used: Message Transformer – XML to CSV converter)
To convert this list into CSV format, we are going to use a Message Transformer of type XML to CSV converter. SAP CPI provides various converters for XML to JSON, XML to CSV conversion and vice versa. You can read more about Message Transformers and different converters here.
Add XML to CSV converter between the content modifier added in the previous step and the end message shape.
Configure the converter as shown below. Provide the path to the data which is to be converted, in our case it we have product and supplier details under /ReorderList/Product. We are going to use Semicolon as field separators and we want to include Field Names as Headers in the CSV list.
Tip: Semicolon is generally a preferred separator as it prevents unexpected behavior when dealing with currency inputs, digit grouping and does not appear much in texts.

After passing through this shape, the list of products is converted into CSV format with headers in the first row.
7. Send List to Manager via Email
(Technical concepts used: Mail Adapter, Security Material)
Now that we have the list converted into CSV format, we are going to send it to the store manager via Email. For this purpose, we use a Mail Adapter.
Before adding a mail adapter, add a receiver to the integration flow and place it alongside the end message shape:
To add a mail adapter, click on the end message shape and connect it to the receiver that we added in the previous step. 
Select ‘Mail’ as the adapter type.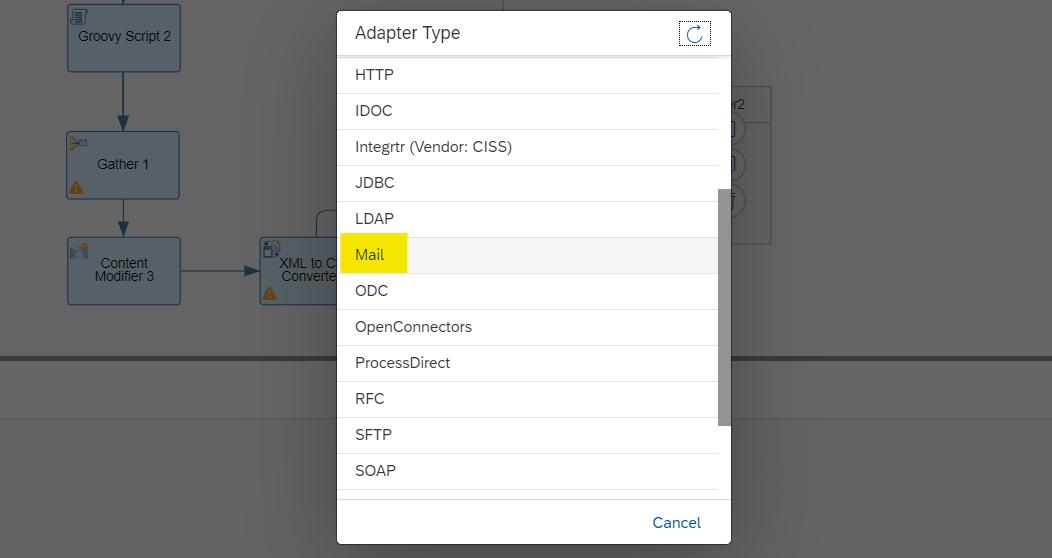
Before we configure this adapter, we are going to add Credentials of the email Id to be used, to SAP CPI Security Materials.
Save the integration flow, and click on the eye icon on the left to go to operations view. Click on Security Material tile under Manage Security, and then on the Add Button on the upper right side of the screen. Select User Credentials.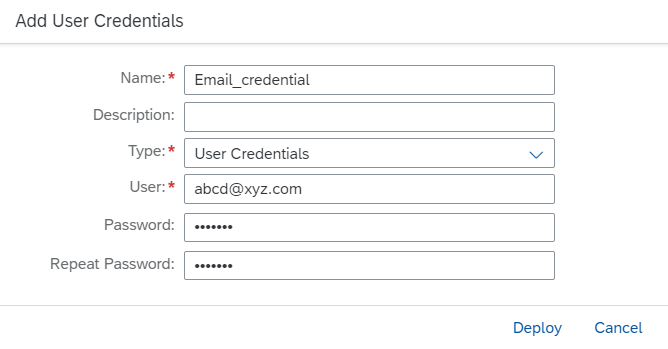
Enter the email Id to be used for sending emails under User field, password for the email id and provide a name to this credential using which we can access it later. Deploy the credentials. Please make sure that the email Id is unblocked for API access, otherwise we will not be able to send out emails using our integration flow.
Now, let’s go back to our integration flow and open it in edit mode. Click on the mail adapter and go to it’s Connection Tab:
In the Address field, provide the SMTP server address and the port number to be used. For example, if you’re using a gmail Id, you can input smtp.gmail.com:587 here. Similarly, if you’re using a microsoft outlook Id, you can input smtp.office365.com:587 in this field.
Specify the Proxy Type, Timeout and Protection values as per your use case. Select Authentication type as Plain User/Password and under Credential Name, provide the name of the credential we saved before this step.
Then go to the processing tab, provide details for the email to be sent like the email address from which it is to be sent. Please note that this is the same email address that we had provided while storing credentials on CPI. Provide the address to which the email is to be sent along with the content of the email under Mail Body.
Since we also need to send the list of products to be reordered, we are going to add it as an attachment. For the attachment, provide a Name of the file to be attached, append .csv at the end of this name to make sure that a CSV file is sent to the manager. Specify the Mime-Type as Text/CSV. We had the list of products to be reordered in CSV format in the message body, hence, we are going to specify the Source as Body. We could have created mail attachment out of message headers as well, and for that we would have specified Source as Header and specified the Header Name. You can read about Mail adapter in detail here.
Now that we have configured the mail adapter as well, we can save and deploy this integration flow. Once deployed, the integration flow will run as per the defined schedule, determine which products need to be reordered and send the list in CSV format to the store manager. And with this, we have transformed what initially was a generic OData service to a customized report processed and delivered using SAP CPI.
In this blog series, we learned about various shapes in SAP CPI while building an integration flow. However, the steps discussed form just one of the many solutions for this use case. For example, instead of specifying Incoming Format as Plain Text, we could have used XML Format. In that case, we would have formed a multimap message and during XML to CSV conversion, the path to source element would have been a little different.
Likewise, instead of using a script after content enrichment step to form XML body with all data at the same hierarchical level, we could have used Message Mapping. Another solution for the same step was to extract all relevant data into message properties using a Content Modifier and forming message body in the desired format again using another Content Modifier. Thus, it is possible to have multiple solutions to a use case, and in that case, we must assess the pros and cons of each solution to select the one most favorable for us.
Now it’s time for us to bid adieu. It’s been an interesting journey and I’m sure that you’ll find yourself much more comfortable at integration using SAP CPI than before. We’ll be back with more posts on enterprise integration soon. Till then, goodbye and happy learning!