


In this first part, we are going to establish a complex integration scenario, discuss the road map to the solution, and begin our implementation on SAP Cloud Platform Integration
Hello technology hitchhikers!
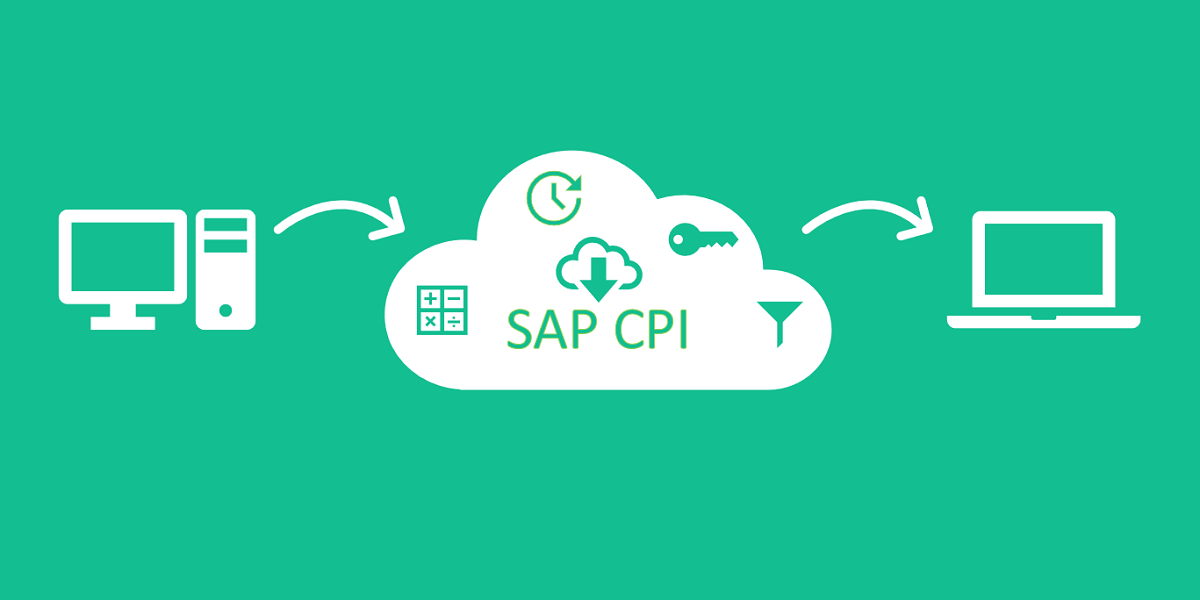
Now that we’ve covered what ERP system and Enterprise Integration means, let’s dig a bit deeper into the integration world and understand the technicalities involved. In this 4-part blog series, we will be focusing on learning in a practical manner and completing an end-to-end integration scenario using SAP Cloud Platform Integration (referred to as SAP CPI henceforth).
I hear and I forget. I see and I remember. I do and I understand. -Confucius
In this first part, we are going to establish a complex integration scenario, discuss the road map to the solution, and begin our implementation on SAP CPI.
Scenario
We run a supermarket called ‘Northwind’. For inventory management, we maintain a list of products along with relevant details like product name, category, units left in stock, unit price and the supplier Id. We have also defined a threshold parameter called ‘Reorder Level’ for each product. Whenever the units in stock of a product becomes equal to or less than this threshold, it becomes eligible for reordering.
Every day, we have to e-mail the list of items (in CSV format) that have to be reordered along with supplier details so that our store manager can place orders.
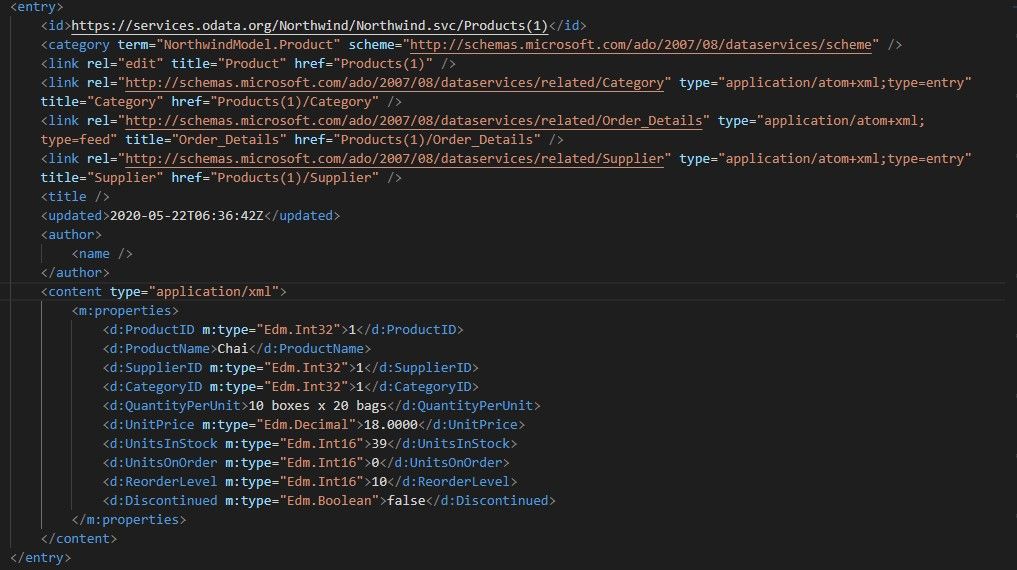
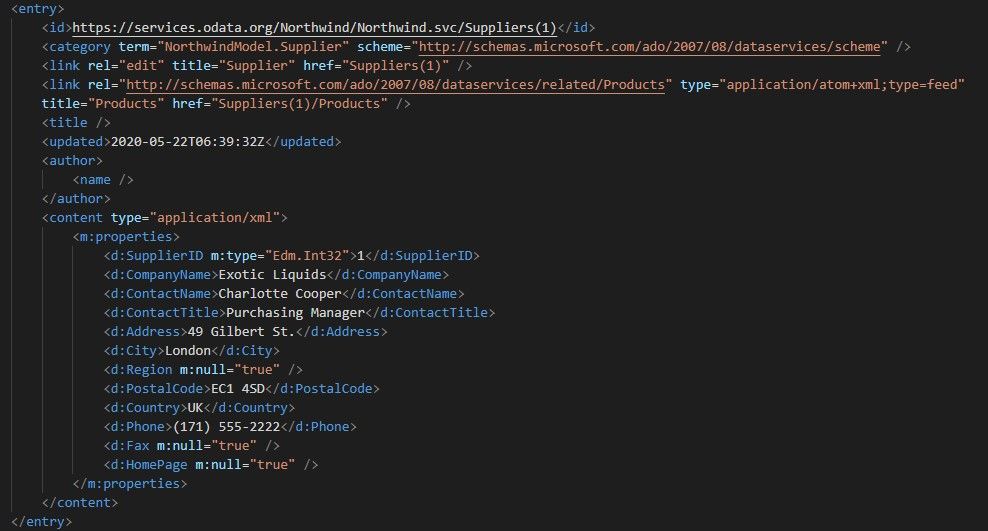
Our Data Source:
We’ll be using a public OData service (Northwind) for our use-case. Below are some samples of how the data feeds for our inventory management system looks like:
Approach
Instead of diving headfirst into the development of integration flow, we are going to divide the problem into smaller parts and solve each part one after the other. Analyzing the scenario, we can identify the following steps to the solution:
- Configure the Integration to run every day
- Obtain the list of products
- For each product in the list, identify if reordering is required
- If product must be reordered, obtain supplier info
- Create a list of the products to be reordered along with supplier info
- Convert List into csv format
- Send List to Manager via Email
Now that we have identified the steps involved, we can begin with SAP CPI development. We are going to assume that you already know the basics of SAP CPI. If you do not feel confident about your understanding of CPI, I recommend you go through the first 3 pages of this guide first: https://help.sap.com/viewer/368c481cd6954bdfa5d0435479fd4eaf/Cloud/en-US/e5724cd84b854719973afe0356ea128b.html
Implementation Steps
Step 1: Configure the Integration to run every day
(Technical concepts used: Scheduler-Start Timer)
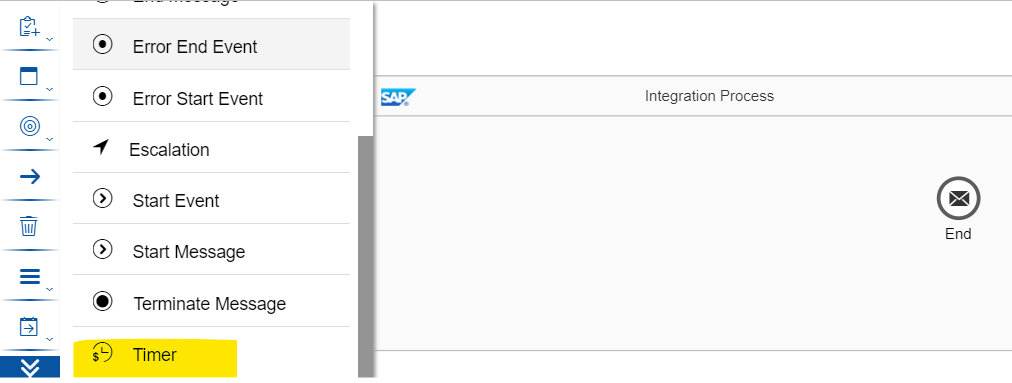
When you create a new integration flow, it has a start message event by default.

We are going to replace this with a start timer so that we can schedule the integration flow to run on a schedule. Start Timer and Start Message come under Message Events in SAP CPI and they denote the start of a message pipeline. They differ in the aspect that a start message event expects a message from the sender whereas a start timer can be configured to run on a schedule. Thus, in a scenario where the source system sends a message to the integration flow which has to be modified and passed on to the destination, a start message event is used. And in cases where the source data has to be polled or the integration flow has to run as per a schedule, start timer is used.
We are going to schedule the integration flow to run daily. The configuration is as shown below:
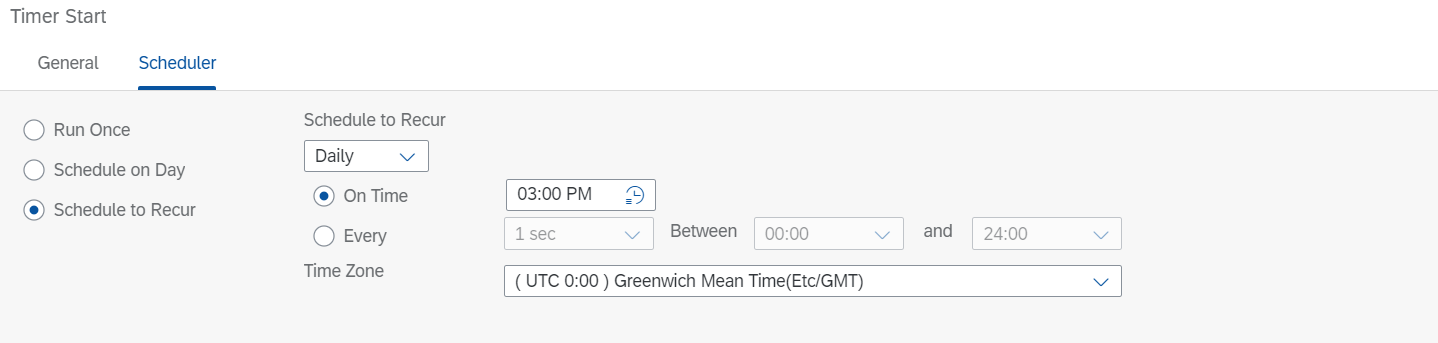
To test the integration flow, you can configure the Scheduler to ’Run Once’. This way the Integration flow will run once every time you deploy it and you will be able to test the integration flow instantaneously.
To learn about message events in detail, you can go through the following blog post: https://blogs.sap.com/2015/01/16/blog-7-message-events-in-integration-flows/
Step 2: Obtain the list of products
(Technical concepts used: Request-Reply Shape)
Our list of products can be fetched using OData protocol. If you do not know about OData protocol, don’t worry, this page has all you need to know for now.
Now that we’ve established the location of our list of products and the protocol to be used to fetch it, let’s go ahead and do so in SAP CPI.
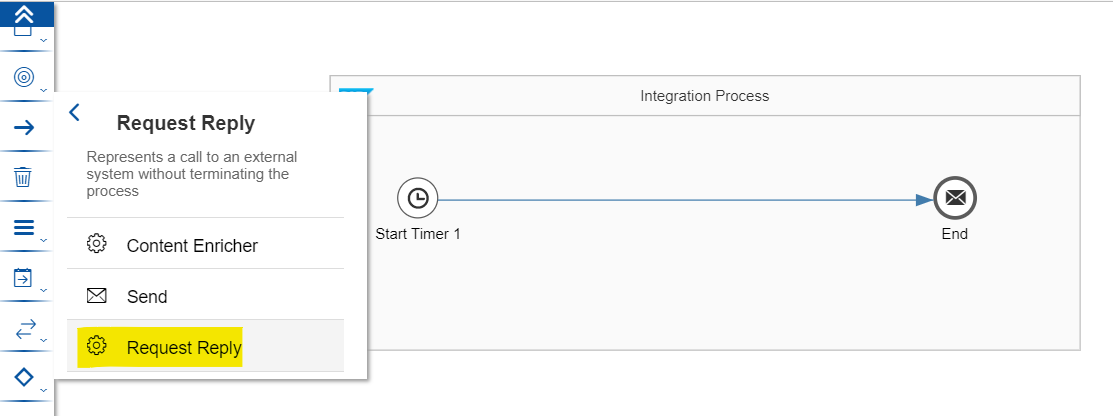
For this purpose, we use a Request Reply call. Request Reply shape is used to make external calls in SAP CPI to retrieve, update, post or delete data. In scenario like ours, where we want to fetch data to be used in SAP CPI, we often use a Request Reply shape.You can read more about Request Reply here: https://help.sap.com/viewer/368c481cd6954bdfa5d0435479fd4eaf/Cloud/en-US/dc39fdd4a44d4b9a9eabb56f49434250.html
Click on Call->External Call->Request Reply:
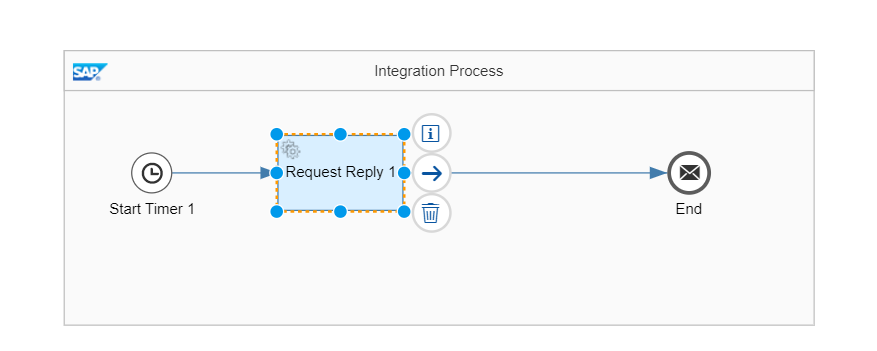
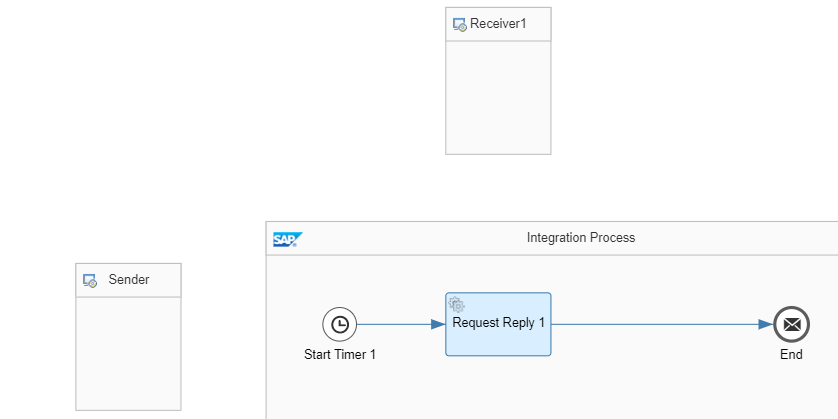
Drop the shape on the canvas such that it lies between the start and end events:
A request-reply needs a receiver to interact with. Click on Participant->Receiver:
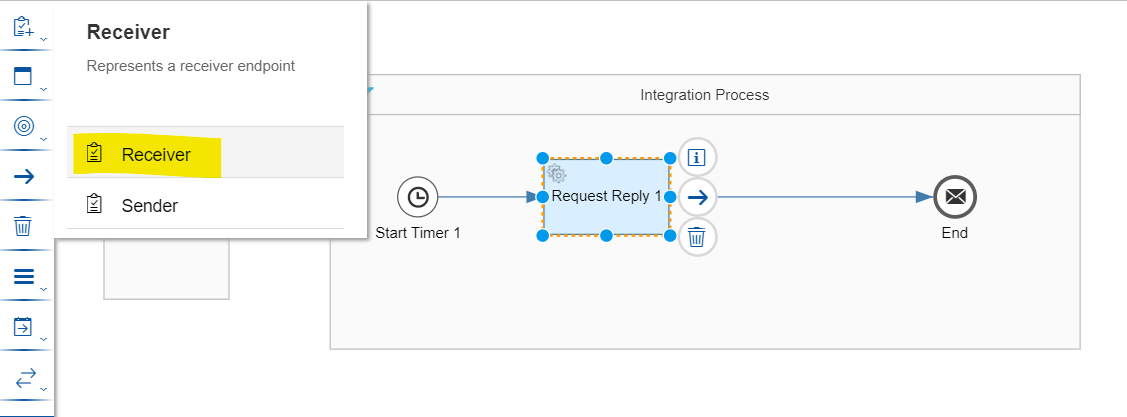
Drop the receiver on the canvas at a location such that it’s convenient to connect it to the request reply shape we had added in the previous step:
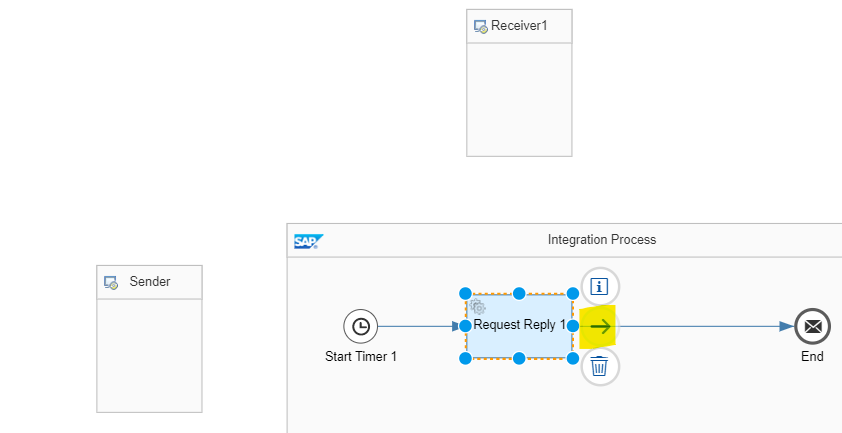
Click on the request reply shape and draw a connector to the receiver we added:
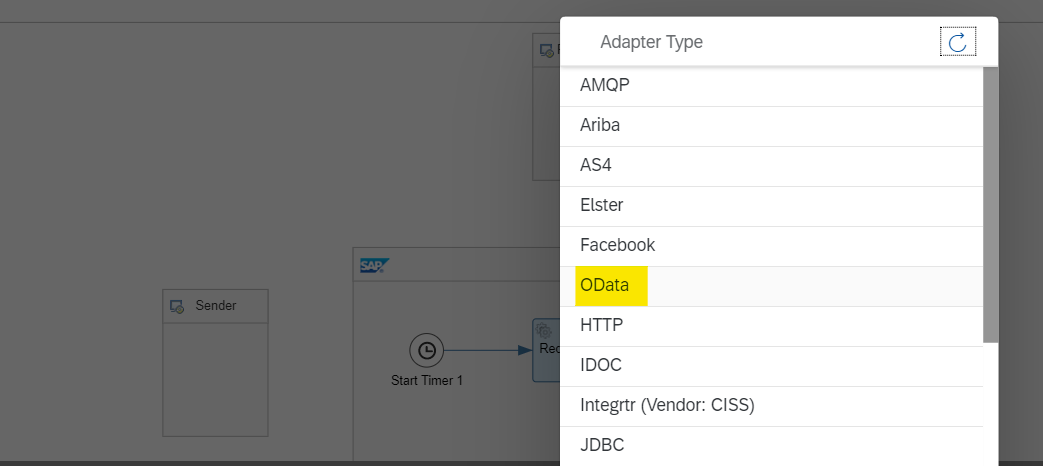
Choose OData->OData V2 as the adapter type:
The OData adapter is configured as shown:
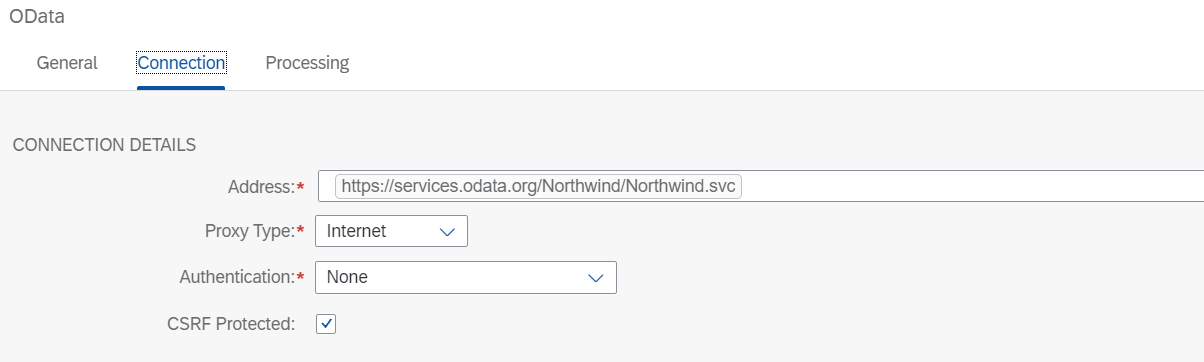
Once you have entered the Address and authentication parameters, click on Processing Tab:
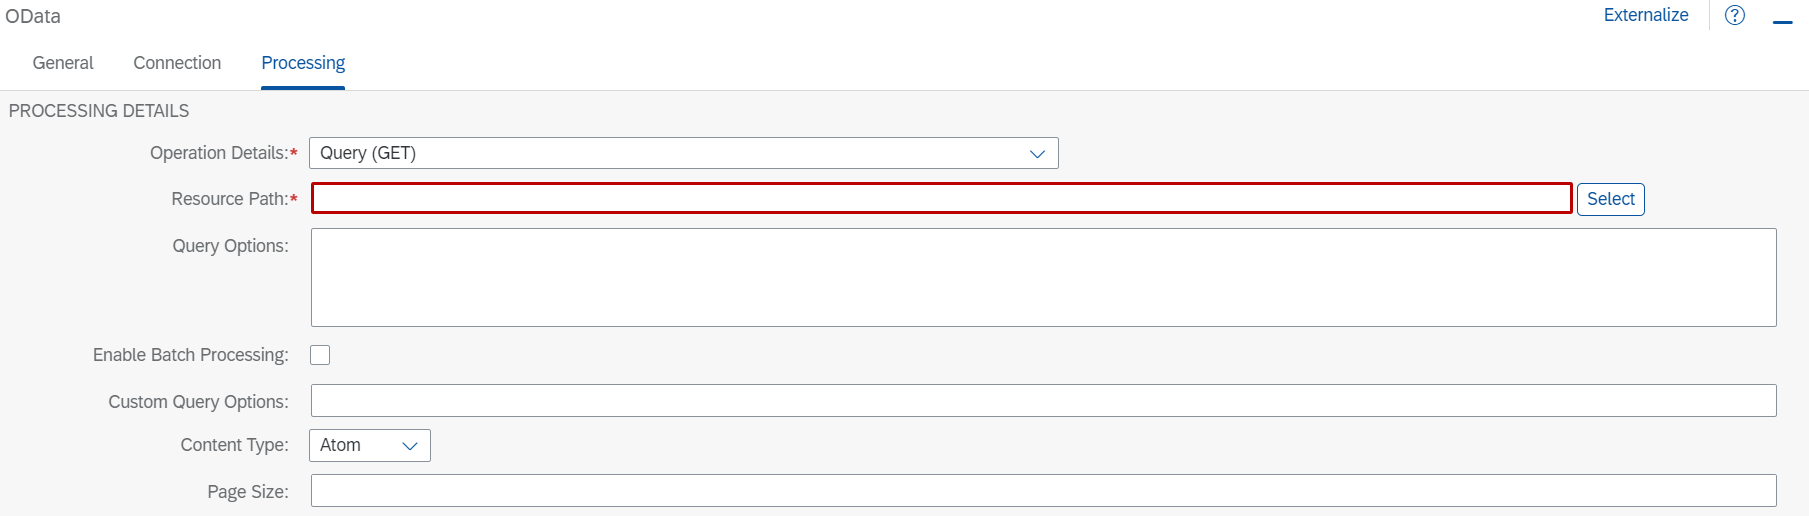
Click on Select next to the resource path:
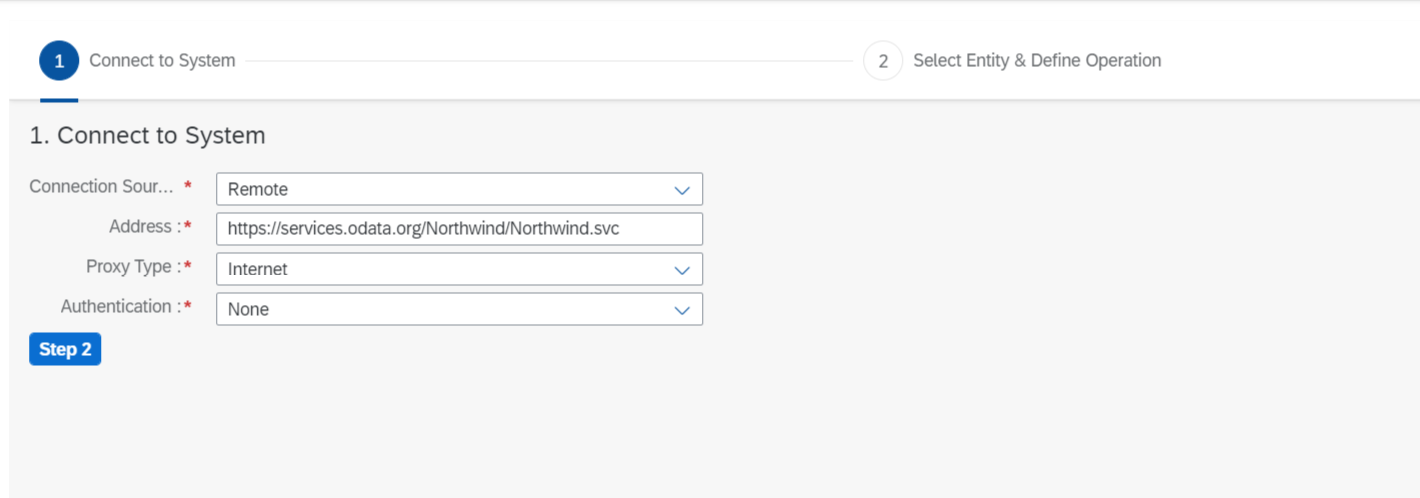
Click on Step 2, select ‘Products’ as the entity and you will see the list of fields that are there under this entity:
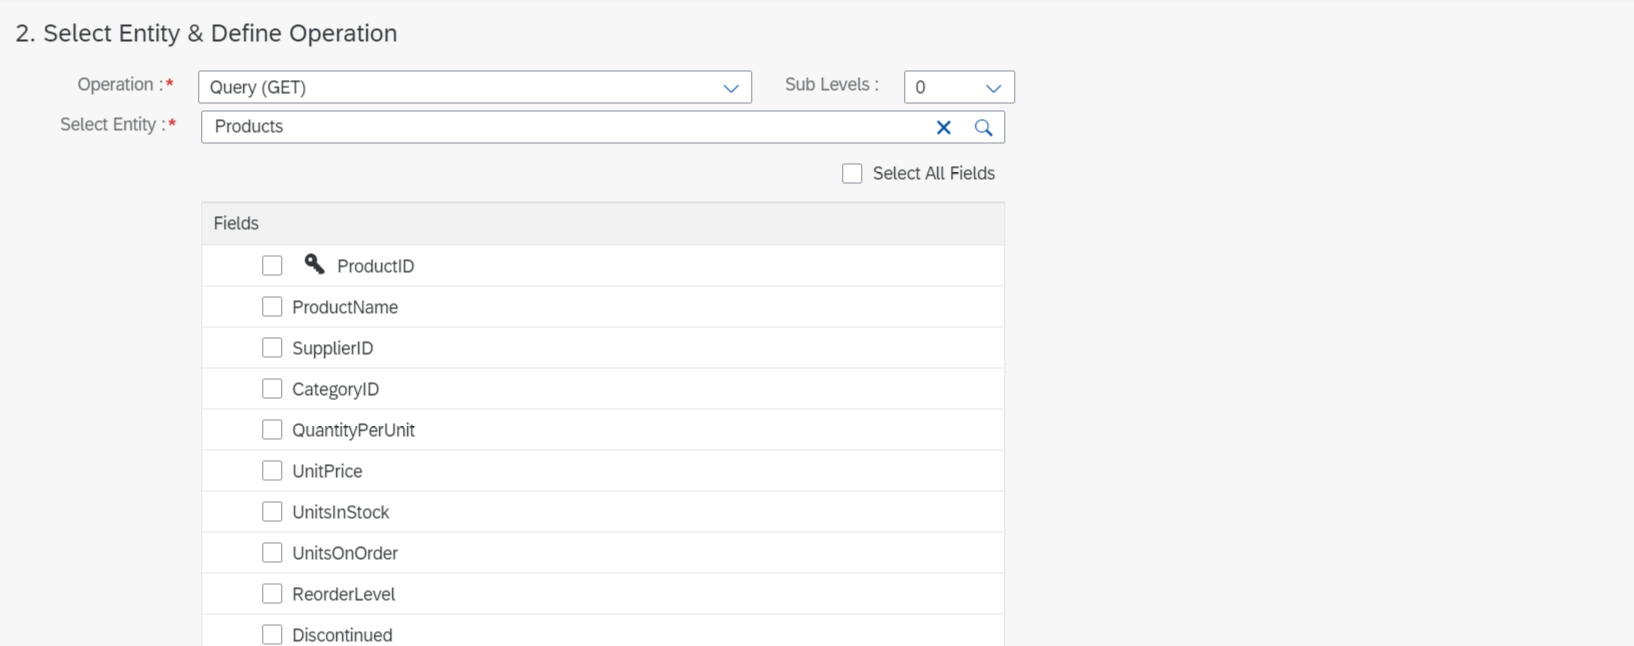
For our purpose, we want data for all the fields, so click on Select All Fields and then on Step 3.
We want data of products to identify which ones need to be re-ordered. Hence, we can safely exclude the products which have an order placed already and also those which have been discontinued.
So, we select the following filters:

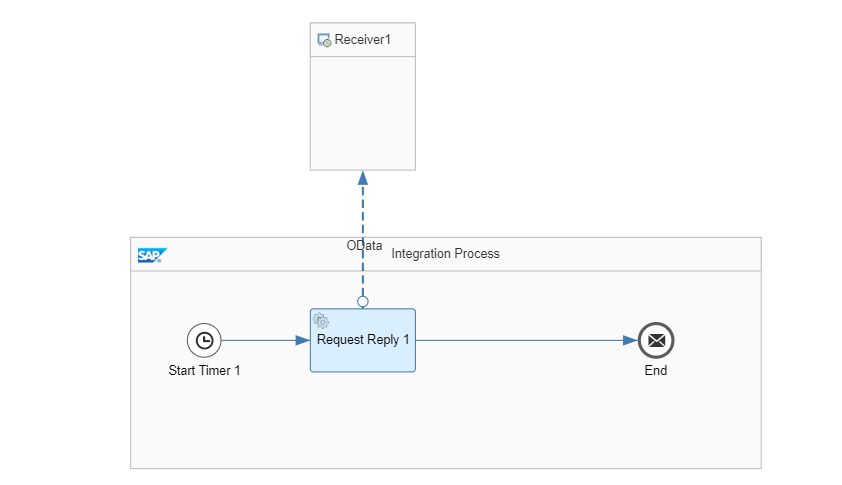
Click on Finish. The integration flow at this point should look like:
Conclusion
We have configured our integration flow to obtain relevant data from products list. You can test the integration flow by deploying it in Trace log level and viewing the message at end message event. Trace is a log level in SAP CPI using which we can ‘trace’ the flow of messages in the integration flow. This is particularly useful for testing and debugging purpose. You can find the instructions to use Trace log level in this well written blog post by Ines.
We are going to take a pause at this stage so that we do not get overburdened with a lot of information at once. In this blog post, we came across Message events and used Start Timer in our integration. We also learned about different scheduling options under Start Timer, use of Request Reply shape, query formation for OData services among other things.
In the next blog posts, we are going to learn more about SAP CPI shapes while using them to solve the problem at hand. It is recommended to get comfortable with the shapes as we come across them. That’s it for now, we’ll continue on our journey of learning Enterprise Integration soon. Till then, Goodbye and happy learning!