


Hello Integration Enthusiasts!
Welcome to the second part of Enterprise Integration with Dell Boomi. In the first part (read here if you haven’t) we had established our integration scenario, divided the approach into 7 steps and also discussed the first step of the solution. In this post, we are going to discuss the second step:
- Obtain the list of products
- For each product in the list, identify if reordering is required
- If product must be reordered, obtain supplier info
- Create a list of the products to be reordered along with supplier info
- Convert List into csv format
- Send List to Manager via Email
- Configure the Process to run every day
At this point, we have product details coming in the form of documents. In the last blog post, on running the process in Test Mode, we had observed that we had incoming data in the form of documents for every product in our inventory. Each document contained details of one single product. This is different from what we had observed in SAP CPI. The entire list of products was fetched in case of CPI and we had to use a splitter shape to split that list into messages containing individual product details.
While fetching these details using our OData client, we had put filters to ensure that only those products are fetched that are not discontinued and not already reordered.
Now we are going to select products which need to be reordered so that only these products are processed further. Details of the other products can be safely ignored. To decide if a product is to be reordered, we’re going to check if the Units in stock are less than or equal to the Reorder Threshold for that product. For this purpose, we are going to use a decision shape.
This is similar to a Message Router shape in SAP CPI, where the path of execution is decided on the basis of some condition defined in the shape. But there’s one major difference here. When we add a decision shape in Boomi, it comes with two routes: true and false. Based on validity of the condition specified, true or false route is taken. In SAP CPI, you can have more than just two routes when you use a router shape:
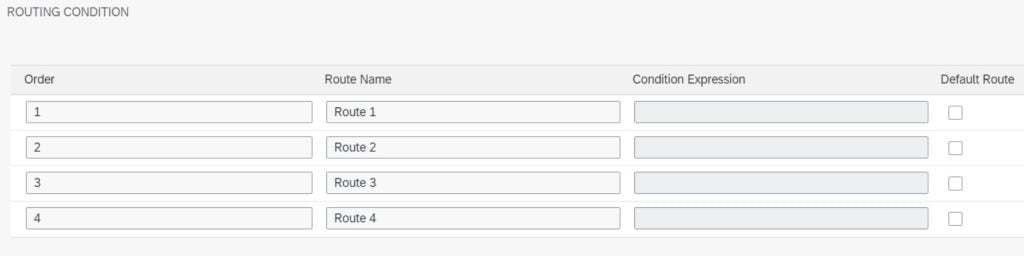
This can be quite useful when we face scenarios where we can expect more than two outcomes. Moreover, In SAP CPI, you can a define condition for every route (except the default route) and these conditions are evaluated in the order specified on the left hand side. Whereas, in Boomi, we specify just one condition in Decision shape, and we can not specify multiple routes and their order of evaluation.
So what do we do when we want to evaluate multiple conditions for selecting a route? Can it not be achieved in Boomi, you ask? This is very easily achievable in Boomi with the use of a ‘Route’ shape. The Route shape conditionally sends documents through different execution paths based on the value of a specified field. This field can be extracted from either a document property or a data profile. You’re already familiar with the concept of data profiles and we’ll talk about document properties later on in this blog post.
The next question you may have is: What is the difference between Route and Decision shape? Well, apart from the obvious difference that Route shape can have multiple routes whereas Decision shapes cannot, it is also worth nothing that in Route shape, we cannot compare two profile values/ document properties. The comparison in this shape is done against constant values but Decision shape does not have this limitation. In a practical scenario, we may end up using a combination of Route and Decision shapes. SAP CPI very smartly combines the functionality of both these shapes in one single ‘Router’ shape. However, this does not mean that the same outcome cannot be achieved in Boomi.
In our scenario, we need to evaluate if the Units in stock are less than or equal to the Reorder Threshold for a particular product. Since both of these are profile fields and because there can only only be two outcomes, true or false, we are going to use a decision shape instead of a Route shape.
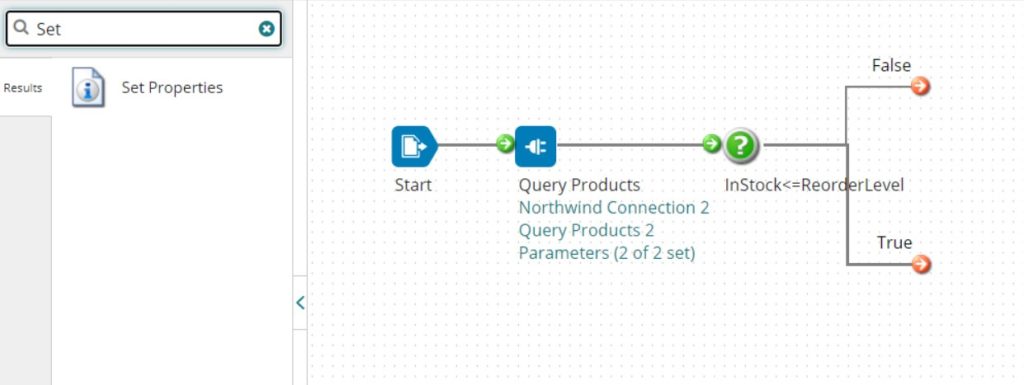
You can find the Decision shape by searching for it in the search shapes bar.
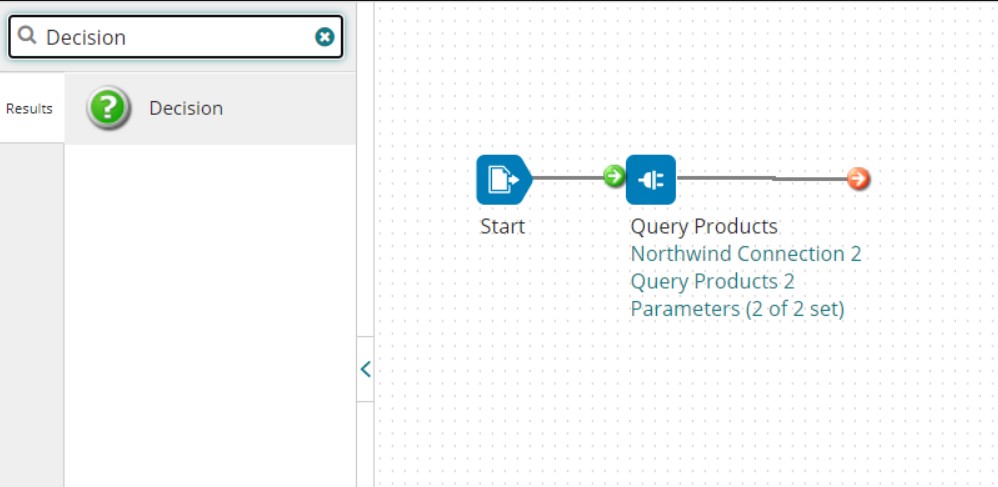
Drag and place it next to the connector on the canvas. Next, we will configure this shape.
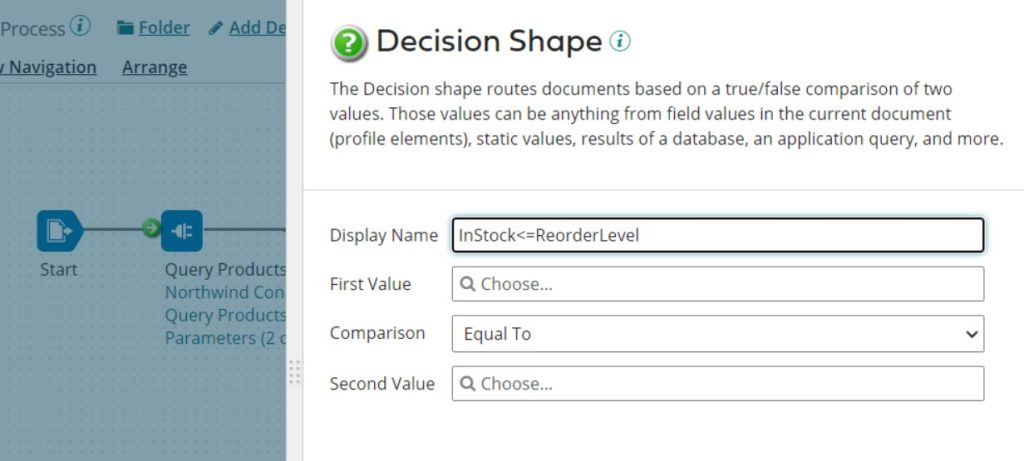
Click on the input control labelled as ‘First Value’ and choose it’s type as Profile element.
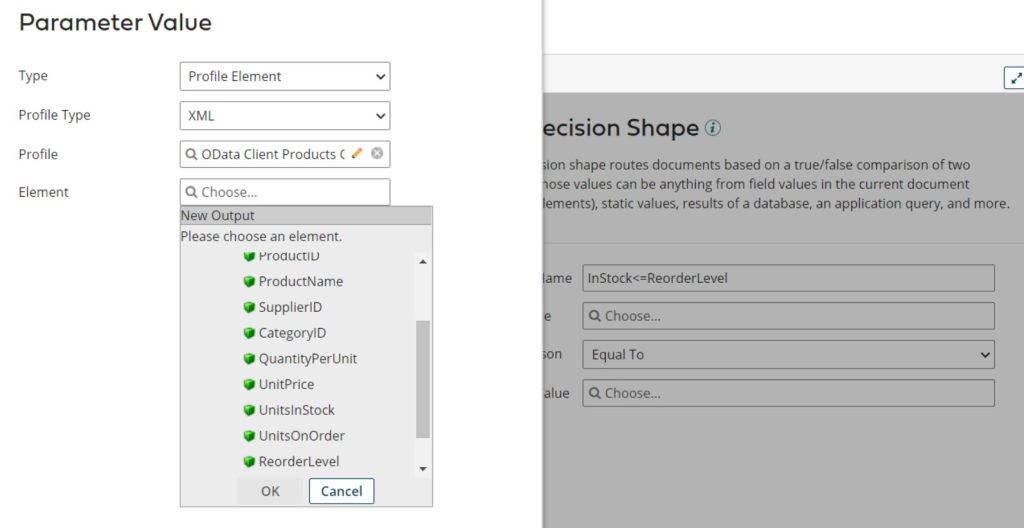
We have selected the Profile Type as XML. And then select the profile that was created by Query Operation in the previous blog post. Select the Element as ‘UnitsInStock’. Once this parameter value has been configured, repeat the steps to Select element ‘ReorderLevel’ for the Second value.
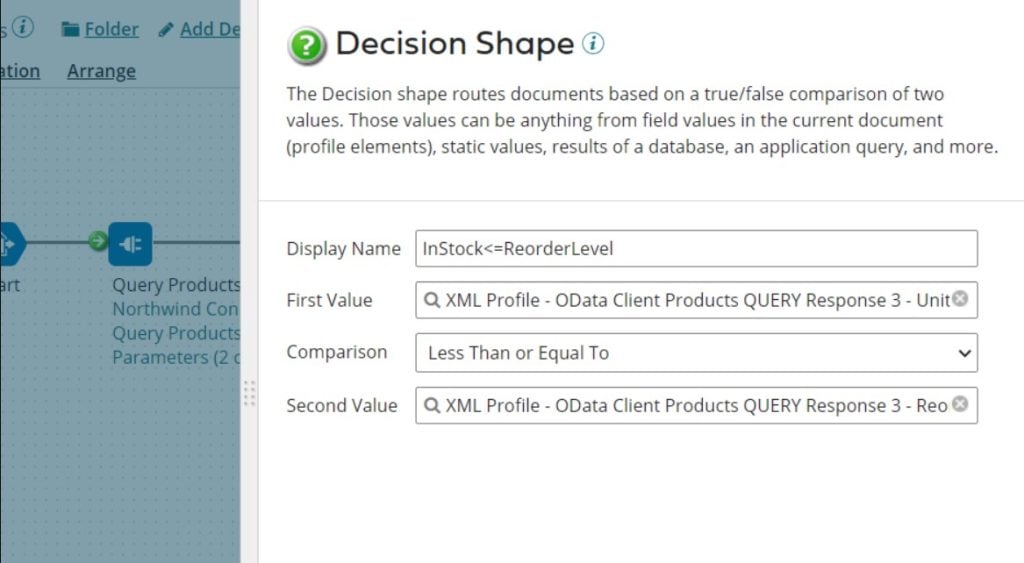
We have selected the comparison as’ Less Than or Equal To’. Thus, we have setup the decision shape to check if the Units in Stock are less than or equal to the reorder threshold for that product. Now that we’ve filtered out the messages which do not need to be reordered (False path), we can safely discard these.

The ones that need reordering should be processed further. We need to obtain supplier details for those products and then present product and supplier details together in a human readable format. One way to go about is to extract the product details and store them as properties. This way, we can fetch these stored properties later and form messages as per our requirement. In SAP CPI, we had the option of storing this data in either Message Exchange Properties or in Message Headers. In Dell Boomi, we have the following options:
- Document Property: Document properties (also called standard document properties) contain connector specific information like file name, size, and whatever connector specific information is available. Document properties can be retrieved as a value in parameters in most places, the Get Document Property map function, and custom scripting. Document properties can be set in the set properties shape, the Set Document Property map function, and custom scripting
- Dynamic Document Property: Dynamic document properties (DDP) are temporary properties tied to a document (as opposed to being tied to the connector). It can have any name and it follows the document through the process. DDPs are set and retrieved per document when a batch of documents go through a shape such as a set properties or map
- Process Property: A process property is a collection of key/value pairs stored in a table like structure. Usually, if you have global variables or want to restrict certain process properties you can use a process property [table]. A process property can be restricted to certain allowed values, otherwise it can be basically anything. If you give them a value, you can retrieve them anywhere later. If you set the value, you can store it for that execution until the execution finishes and it’ll go back to the default value.
- Dynamic Process Property: Dynamic process properties (DPP) are process properties that live as long as the process lives. They can be named anything and can be used as long as you use the same name. DPPs take on the value of the last document that reached it. If you have a batch of 5 documents go to a set properties where you set the DPP to be an element of the document, the DPP will be the last document’s value
We are going to use Dynamic Document Properties because the details we want to store are specific to the documents and not process or connector specific. For this purpose, we are going to use a set properties shape. You can find this shape by searching for it in the search shapes bar.
Drag and place it next to the connector on the canvas. Next, we will configure this shape.

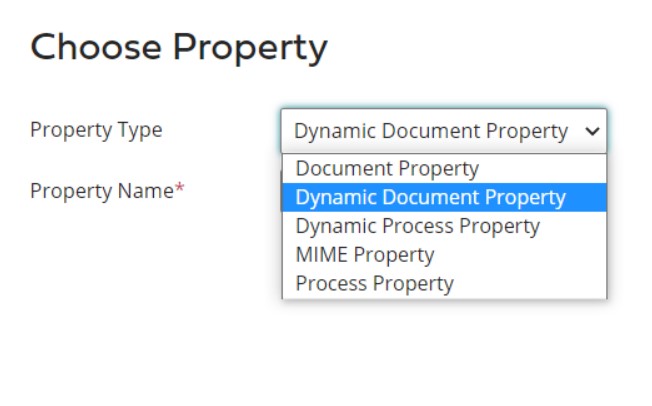
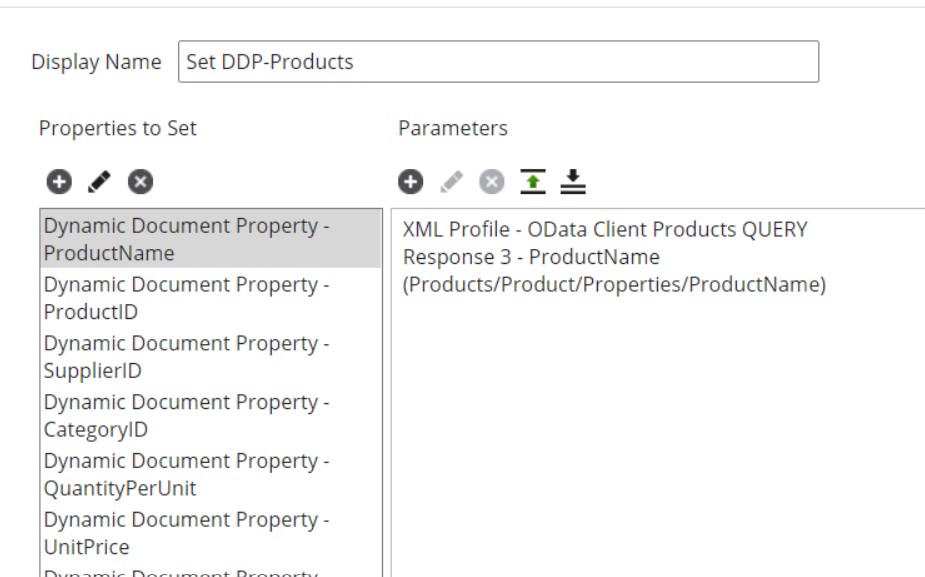
Under Properties to Set, click on the ‘Add Property’ (+) icon. In the popup, select Property Type as ‘Dynamic Document Property’.
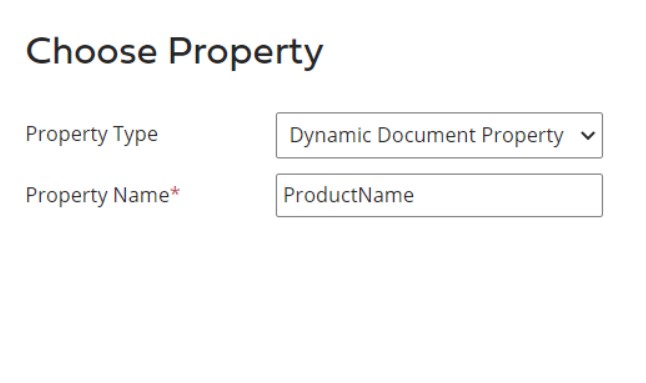
Give the Property Name as ‘ProductName’ and then click on Ok. Now we have specified the name and type of the property. Next, we are going to Specify the parameters for this property.
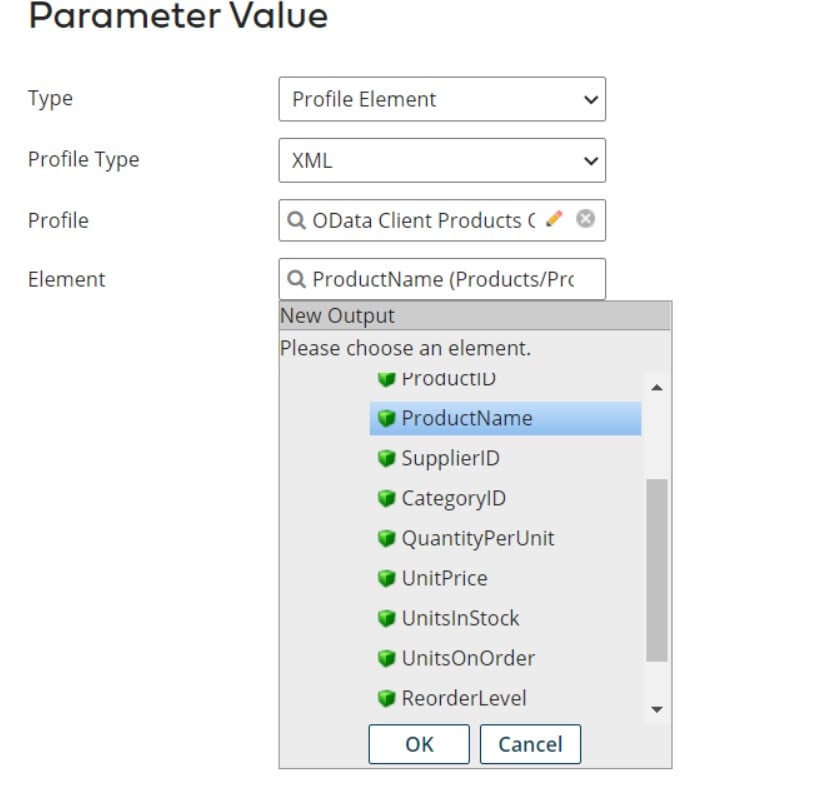
Click on the Add Parameter button under Parameters, you will see a ‘Parameter Value’ popup.
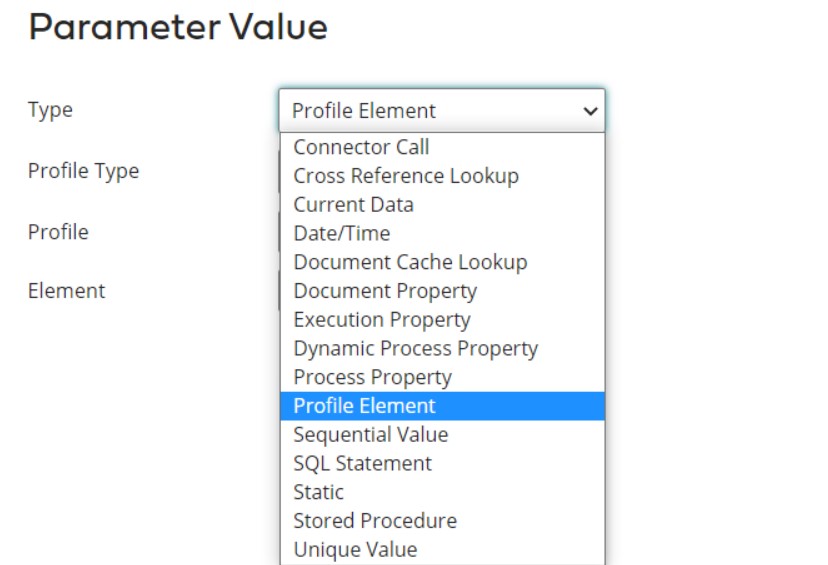
Select Type as Profile Element, Profile Type as XML, and then select the profile that was created during the OData Query operation. Select Product Name in the input control labelled as Element. Click on Ok.
Repeat these steps and Add Dynamic Document Property for every Product field in the document that we want to save.
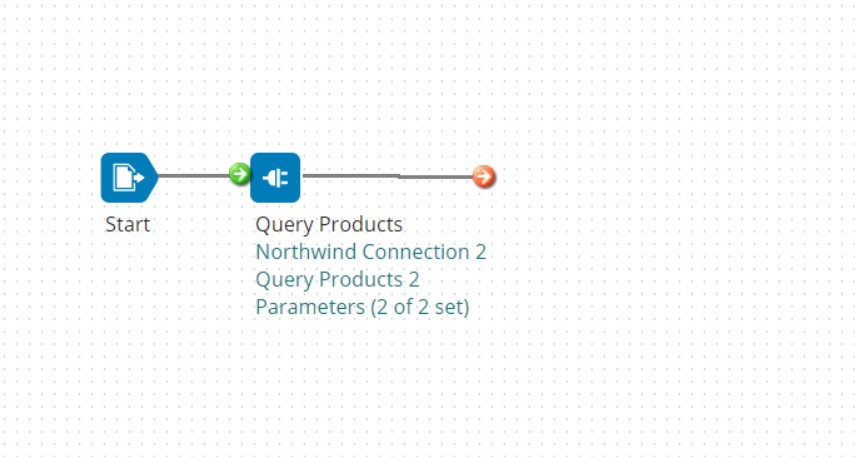
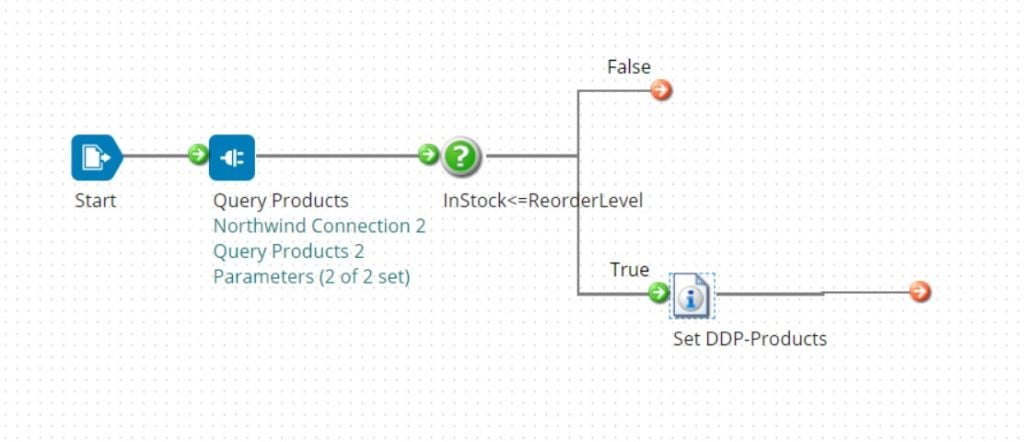
After this is done, the resulting process will look something like this:
We can Test the Process again to check which documents are flowing through these paths.
Conclusion
This is where we are going to take a break to fully understand and appreciate the concepts that we discussed. In this blog post, we completed the second step of our solution. We learned about Decision shape, Route shape, Set Properties shape and also talked about the corresponding shapes in SAP CPI. In the next blog post, we will discuss the next steps to be taken and learn more about the components involved. Till then, Goodbye and happy learning!